Thursday, November 25, 2010

Get the party pimpin’!

Don’t ever make me say that again! So far my original title, on a slightly original topic. It’s still about food, but this time I’m not giving any recipes. I can’t say I used any for these. I’m not quite sure how many people would murder me for just using cake mixes from time to time. It’s a lot easier to just add water, eggs or oil to a bit of flower, mix and pop it in the oven. Especially when you’ve got no time to waste, and you’d rather spend it on decorating. Plus some cake mixes really aren’t that bad!

Let’s look into some pictures of the last birthday I did: my sister’s 15th! She wanted it 3D, with roses and it had to be pink, other colours were acceptable too, but preferably lots of pink. I cheated on this one, buying the fondant, as well as premade roses. Made the cakes inside with a cakemix, but DID make the buttercream myself! Plus the crafting, which was most of the work! I used red velvet and rainbow chip cake mixes for the inside. Id made an odd combination to look at, but it was delicious anyway!

Photobucket

Photobucket

Photobucket

Next up were a lot of cupcakes for the family. I used the special cakestand I bought especially for my sisters birthday cake again and I let my sister sprinkle the cupcakes with rainbow sprinkles. Appearantly my mom got comments that the cupcakes weren’t real when she offered them to the family. They later translated that to “they are so pretty!” to me, so I’ll take that as a compliment!

Photobucket

Photobucket

Finally I also made a Sacher Torte, because after I made delicious meringue frosting and used a cakemix, I thought it was time to make one of my own. The pie was delicious, the frosting failed this time, it was like buttercream but it failed even to be that! I will post the recipe for the Sacher Torte up some time I have time and I can be bothered!

Photobucket

What else can you make with cake mixes?
Pandan chiffon cake! Look at it! A funky colour green, a lovely texture (I did it right this time) and it tasted awesome as well! I don’t think this cakes lasted a day.. Ah, my first attempt to a NABcake in honor to the ever-busy Coz!

Photobucket

Photobucket

Wauw, that was it for pictures I have of things baked with cake mixes! I should work through more pictures though. How about the bento boxes I’ve made? Baked apples? Delicious looking buns I’ve forgotten the recipes of? Or all the things I don’t want to know the recipes of, such fails!? Maybe this calls for a: Next Up! “Ups and down’s in my kitchen”. Perhaps I’ll think of a more catchy title by then..

Rainbow jelly & marshmallow pie!

It’s a rainbow jelly pie! Oh doesn’t it look lovely??
Not sure where I got this idea again, maybe it was from the sweet rainbow cake and rainbowjelly pictures I've seen on google or I got the idea after seeing the rainbowcoloured packages for the jelly. Whichever way it was, I knew I HAD to make this cake at some point. I used marshmallow ‘pie’ inbetween so the colours wouldn’t blurr or mess up.
I used about a fourth of the ingredients for the marshmallow pie for every marshmallow layer and a fourth of every Hartley’s Jelly package I bought in all the cool colours I could find! I don’t believe I ever greased the glass oven bowl I put this in, but it wasn’t a problem. Do keep in mind that due to the setting of each layer before you can put another on, this might actually take a day or two, three! It doesn’t take much time however!

Photobucket

Ingredients:
Jelly layers:
Jelly in all colours of the rainbow!
Water (as stated on the package)

Marshmallow layers:
2 large white marshmallows (25-30 gram)
20 ml milk
40 ml whipping cream
1 gelatine leaf


1. Start with a jelly layer! (if you want) Put the jelly blocks in a large cup and add the boiling water. Wait till the jelly is dissolved and poor it in the bowl or tray you wish to have your cake in. Pop it in the fridge and wait until set.You might want to use just a small portion of the jelly, or the layers will be very thick.
2. Put the marshmallows in a small bowl and sprinkle the milk on top. Leave it in the microwave and stir it every 10-20 seconds until the marshmallow has dissolved and the mixture is non-lumpy.
3. Use another small bowl to mix the gelatine and whipping cream together. Put it in the microwave as well, and stir every 10-20 seconds until everything's dissolved.
4. Add one of the two bowls to the other and mix. Poor it onto the set layer of jelly and pop it in the fridge again to let the marshmallow layer set.
5. When this layer is set, repeat step 1 for a jellylayer, when that is set, repeat step 2 to 4 for a marshmallowlayer, and so on. The rainbow jelly&marshmallow pie is done when you can’t stand another layer! Serve with a warm sauce like custard, or eat it nice and cold!

Photobucket

On a sidenote, I made this in a complete different kitchen in England and kept popping everything in a microwave and randomly running downstairs to the kitchen again to make the next layer. It took me a total of 2 days as the jellylayers took quite long to set, but I’d made the next layer in about 10 minutes tops and got handier at it with the layers! Because of all the sugar and jelly and whatnot the pie really won’t go bad in the two days you might need to make it. It goes quite well with custard really. I’m starting to think this is an English flaw, they put custard on everything!
I managed to take some quick pics (not my best) before we omnomed it all!

Wednesday, November 17, 2010

Cheesy bread

While I’m busy blogging anyway, my wow is downloading and photobucket is down and I really can't be asked to do any of my homework, I might as well keep posting! So I’ll say something about bread. I can’t really live without bread and eat it every day. Of course I prefer (sweet) buns over loafs and I’d still much rather have dark grainy bread than anything close to plain white. After my exams I really felt like baking (and appearantly I’m the only one that wakes up thinking she wants to make buns) and I decided I’d make cheesy buns. The idea was making bread dough with cheese mixed in (perhaps some salami/proscuitto as well), then making pesto or some herby butter, cut off bunsized dough bits, roll them out, spread the pesto over and roll them up again, put them in my lovely tiny loaftin and coat them with a bit of milk and then loads of cheese. The idea was perfect! But when you’re slightly falling ill, everything is going completely wrong and you’re having a BAD DAY, then of course, this idea would just be ruined as well. I put my breadmachine on the perfect settings, absent minded as I was and by the time I went to check, I had baked myself a nice bread. That is, I was just in time to dump some grated cheese on, but either way my idea of buns with a pesto swirl was completely gone. So I’m not posting a recipe on this lovely idea, but just on simple bread with a hint of cheese coated with quite a lot of cheese.

Photobucket

Ingredients:
slightly less than 1 cup water (210 ml)
1 tablespoon olive oil
3 cups white flour (350 gram)
3/4 cup (cheddar) cheese (75 gram) plus more for coating
1/2 teaspoon salt
1 teaspoon granulated sugar
1 teaspoon dried yeast
milk, for brushing


1. Poor the water and oil into the bread machine pan and sift the flour over. Add the cheese on top and put the salt and sugar into a different corner of the pan each. Then make a well in the middle and add the yeast.
2. Put the machine on a normal white bread cycle and leave it! (Or put it on a dough cycle if you want to make minibuns with a pestoswirl.) When the doughcycle and rising is done and the machine starts to bake the bread, brush some milk over the top and add as much more cheese as you want on top. Leave it again until it’s done and then well.. done!

Ah, you just gotta love breadmachines for being so easy though. Even though they can ruin your bun-plans the little backstabbers! Hope you enjoy this recipe as well!

Photobucket

Photobucket
Don't you just love messy pics taken quickly at night with horrible lighting and what not?

Leek soup with coconut milk

When my mom comes up with “Let’s go shopping with the whole family!” I can only think of horror-scenario’s. Shopping with a bunch of women means every ile will take at least an hour to get through and every single thing on every single shelf will be looked at, picked up, considered and probably put back – or in the worst case BOUGHT. I have nothing against buying things, but when my family thinks it needs scrapbookstickers when none of us like to do the whole scrapbooking thing, it makes me want to kill things. But most of these everything-and-nothing shops have a book section, so this is where you’d find me. While my sisters came home with bags full of clothes, perfumes, make-up, paintings and other nicknack I got a book called “Soups”. It’s got soups in it alright! From the one I’m writing on now, to fruitsoups, unionsoup, mushroomsoup, spinachsoup, breadsoup with tomatoes till things like almondsoup, garlicsoup and cold yoghurtsoup. Trying some of these will be quite an adventure.
According to the way this leek-soup looks this might’ve been a sweet idea for Halloween. Too bad I hadn’t thought of that. The soup is quite tasty and I really like the coconut cream through it, but don’t use too much lemon. I had to throw half my soup away after I added too much lemon and no one liked it anymore. Originally the recipe used lime though, and that might’ve been why it went terribly wrong with the lemon’s my parents had brought home from doing the groceries. But before I destroyed it the soup was ‘lush’ as some English like to put it. So go easy on the lemon and you might like this soup just as much as I did! Note: if you don’t have a whole family to feed you might want to start off with half.

Photobucket

Ingredients:
Splash of olive oil
2 leeks
half a (green) bell pepper
2 potatoes
1 lemon (or 2 limes)
handfull coriander
600 ml vegetable broth
225 ml coconut milk
salt and pepper to taste


1. Start with slicing the leeks into thin slices. Chop the bell pepper in small pieces and the potatoes into little cubes. Grate the peel off the lemon and cut the coriander into smaller pieces. Heat a bit of olive oil in a pan and add the leeks, bell pepper, potatoes and grated lemon. Cook everything for a few minutes
2. In the meanwhile cook the broth in a pan. Add the leek/bell pepper/potatoes/lemon peel to the broth and bring it to boil. Lower the heat a bit when it boils and leave the soup to simmer until the potatoes are ready.
3. Take the soup off the fire and leave it to cool for a bit while you get out a food processor. Poor the soup in the food processor and ‘process’ it till you have a thick soup without any large lumps. Then poor everything back into the pan.
4. Time to put the soup on the fire again! This time add the coconut milk and the lemon juice (easy easy!!) until you like the taste. Mix everything in well and make sure the soup doesnt start boiling again.
5. Done! You can eat this soup either warm or cold and serve some lovely crackers with or use it as a starter for your Christmas dinner.

Photobucket

That reminds me I have to set up a menu for Christmas. I want to cook a lot and make some things nicely in theme (Im thinking of making green and red bread)! So that’s another thing I need to look into. Currently still trying to figure out how Im going to study abroad and what I need. Wonder if I’ll have a kitchen sufficient enough to do some baking...

Tuesday, November 16, 2010

Crackin' crackers

So what can I say about crackers? They are just bloody simple crackers. Obviously nothing is ever as it looks and there is actually an art to making crackers. Mine for instance aren’t thin enough. They’re nice but not thin enough and I swear they couldn’t get any thinner when I made these. Although a bit more doughy – just very slightly – at some points in stead of the cracky feeling of a cracker, they were nice. I think I made a slight mistake when I put anice in these crackers in stead of the prescribed cumin. Although I still might have been better of with dried parsley and a hint of garlic. You could put anything in really as long as it’s dried. I wouldn’t recommend putting sweet things like dried fruits in, especially since you also have the size to take into account. So, let’s get to the recipe then eh?
The recipe makes about 48 pieces for which you’ll need two baking trays. You might want to start off with half if you’re not sure you like it or if you don’t want so many. 48 crackers will be gone in no time though, mind!

Photobucket

Ingredients:
250 grams flower
1 teaspoon baking powder
1 teaspoon salt
60 grams margarine (cold)
1 teaspoon roasted anice seeds (or cumin or anything else to your liking)\
100 ml water


1. Start off with sifting the flower, baking powder and salt together. Rub ther margarine in with a spoon or so. You should get a lot of crumbles. Make sure there are no lumps of butter left. Add the anice seeds after.
2. Add the water bit by bit and mix it in with your spoon. The dough must remain firm but kneedable so don’t add too much, or add more when needed.
3. Kneed the dough till all the ingrediënts are mixed in and it is to your liking. Warp the dough in foil and leave it in the fridge for about half an hour
4. Take the dough out of the fridge and kneed it again. Take about a fourth of the dough and roll it out on the (floured) countertop making sure its REALLY thin. Then cut out rectangles with either a cutter or in my case a rolling pizza knife (whatever it’s called!) or some other funky shape you feel like cutting really.
5. Line two baking trays with baking parchament and organise all the crackers on there. Preheat the oven to 180 degrees Celsius or 350 degrees Fahrenheit and bake the crackers in about 10 minutes goldenbrown. Done!

Photobucket

And then you have your own home-made crackers which you can eat with soup or cheese or however you like to eat your crackers. Wonderful, isn’t it? And it’s really not hard, but I might want to make a video of making these some time. Not only because it’s easy, but because some people might still need it and to see how making a video of me baking will turn out. I haven’t tried it yet, and almost everything is worth at least a try right?

Photobucket
If you ever come across cream cheese with sweet peppers - it's seriously worth a try!

Friday, October 29, 2010

Chocolate, caramel coffe cupcakes with toffee topping

A whole mouth full, all in one. They’re PERFECT! You know when you bake something, and when you taste it you can barely believe you made it yourself that’s how nice it tastes? Making the cupcakes from this recipe was one of those times. Wauw, I must’ve gotten really lucky!

Photobucket

So basically, I felt like baking, especially using a new silicone cupcakemold my mom bought for me. It’s one day to halloween so the autumn-feeling fits. I regret not being able to make much for halloween or doing anything at all for it. But when you have no one to celebrate it with it gets kind of boring quite fast. I can’t exactly remember where I got the idea but I wanted to make coffee cupcakes or pudding or make carrotcake. Somehow it fitted the autumn perhaps? Just like the pumpkinbread or cake I still want to make! Anyway, it ended up with chocolate as well. The coffee I used had a caramel taste, so I got that was well. Then I tried making a toffee topping, and hell, you got yourself a damned long title. So let’s get to the recipe!

Photobucket

Ingredients:
225 gram selfraising flour
1 teaspoon baking powder
1 tablespoon cocao
225 gram (unsalted) butter
225 grams brown castersugar
4 eggs
3 spoons instant coffee (or two 1-cup packages)


1. Start off with preparing our instant coffee. Dumb two packages, or 3 spoons, in a cup and add about 2-3 spoons of boiling water and stir it a little. Leave it to cool a bit.
2. Weigh the dry ingredients: the flour, baking powder and cocao and sift them into a bowl.
3. In a seperate, larger bowl mix the butter with an electric mixer until fluffy. Add the caster sugar then mix again until the sugar is nicely mixed in.
4. In ANOTHER small bowl, break the four eggs and beat them slightly. Add these eggs to the butter in about 4 additions and mix everything until it is nicely mixed in.
5. Now add the dry ingredients in several additions and mix well between each addition.
6. Preheat the oven at this point to 180 degrees Celsius or 350 degrees Fahrenheit. Don’t forget to use cupcakecups or butter and/or line a tin and fill the tin for about 3/4. Leave it in the oven for about 15-20 minutes and your cupcakes should be perfect!

I noticed this recipe takes a lot of bowls and a lot of mixing. I just realised all recipes are like that. A complete disaster for my kitchen and very environmental unfriendly that is!
Pretty standard recipe don’t you think? I imagine if you don’t like any kind of coffee you can replace the last bit with instant chocolate milk or just milk or instant ice tea or instant banana smoothie. Then again, the last two sound kind of odd, but chocolate and banana is not a wrong combination either.
And now for the toffee topping which I used on 6 cupakes!

Photobucket

Ingredients:
15 toffee/fudge candies
1/4 cup of milk


1. Just add this together in a pan and doubleboil it. It might take a pretty long while before it is melted though!
Do make sure you have a nice kind of toffee candy for this, because what I made just tasted plain chemical. The fact that my sister still really liked it just means she has no taste. Update: appearantly I was the only one that thought it tasted chemical. Maybe there's something wrong with my taste? -the world ends here-
I hope you’ve enjoyed!

Photobucket

Saturday, October 16, 2010

Happy cakes with butter icing

I lost some of the picks! Can you believe it!? Horrid! But they still look really colourful on the picture. I like them, might get my mom to get some more.
Anyway, about the cakes! I’ve used a recipe I posted before. Honey cupcakes are just real easy to make and somehow they’ve only turned out well, so I just used this again. Plus there’s no need for millions basic cake recipes. The butter icing I’ve posted before as well, but hell, here I’m posting it again and I’ve changed it anyway. I’ve improved quite a bit with making this créme so I’m saying its worth it as well. Plus, I now have a new piping set, consisting of plastic bags and about 5 tips. I used a massive “drop flower tip 2D” for making this, for anyone who’s interested.

Photobucket

Ingredients Improved butter icing:
75 gram (unsalted) butter
250 grams powdered sugar or icing
Colouring/flavouring


1. Well, mix? With an electric mixer? We’ll be fine that way!

Ah, love recipes that only include mixing. Makes life so much easier. You can’t imagine how much work some of the icings are! Anyway, there you have it! Lovely icing! You can use on anything and everything and it’s easy and just lovely!
Ah, this recipe is not fatfree mind! Not quite caloriefree either. But nice. Real nice.

And it looks fun right? With my special colour dust spray! And picks, of which I’ve lost some. Yes! Hopefully you enjoyed and I’ll make sure to post again soon!

Photobucket

Photobucket
Look at the mess!! Getting the icing in a piping bag is hell!

Photobucket

Thursday, October 14, 2010

Whipped cream cake (with fatfree spongecake)

Admittedly I really dislike whipped cream cakes. Somehow the chemical, oversweet whipped cream cakes you buy in shops make me feel unwell after eating a piece. Maybe it’s true that everything homemade tastes a lot better, because I was quite impressed with my version! I used fruit from a can to give it some extra taste. The fruits were probably the only healthy thing about this cake, and even then they were soaked in syrup!

Photobucket

The spongecake I used is one of the easiest ones and needs the least ingredients. Also, because it doesn’t need any butter, it is fatfree. Because of this though, you can’t keep it well for too long. Note that if you use this spongecake for Swiss rolls or flatcakes, the baking time will be about half. Also you will have to fill and roll as soon as the cake is cool enough to touch, in stead of leaving it to cool for longer.

Ingredients spongecake:
4 large eggs
½ cup caster sugar (115 gram)
1 cup flour (115 gram)


1. Beat the eggs together with an electric mixer till you have a white and fluffy mixture. Add the sugar spoon by spoon until all is well mixed and you have a creamy, airy mixture.
2. Sift the flour and add it to the eggmixture and carefully fold it in (or just mix it in like I like tend to do).
3. Preheat the over to 180 degrees Celsius (or 350 degrees Fahrenheit) and bake the cake for about 15-20 minutes or when the top turns golden brown and a skewer comes out dry. Leave to cool and cut in half with a skewed knife so we can go to the filling!

Photobucket
Look at that batter! I could eat it just like that!

Ingredients whipped cream filling:
500 ml whipping cream
granulated sugar


1. Whip the whipping cream until stiff and add the granulated sugar spoon by spoon until you decide its sweet enough. You can also add colourings, essences, liquors at this point, or completely leave everything including sugar out.

After you’ve spread the whipped cream filling between and all around the cake you can add nougatine like I did. I left the cake on the bottom of the caketin for this, and held it in the air above a bowl. I filled the bowl with nougatine. I ook little hands full and pressed it to the side of the cake. It takes some time and your arm will get sore of holding a cake up plus you can’t press to hard or it won’t look nice, but my cake did in the end so I think it was worth it.
Well what do you think? I think it looks rather professional. Perhaps fruit from a can wasn’t the best choise and I shouldve gone for fresh instead. Especially since the whipped cream doesn’t last either and the whipped cream seems to suck up the juice and change colour. Other than that, it still tasted quite fine and the rest of the family loved it as well. They even thought it looked professional!

Photobucket

Photobucket

Saturday, September 11, 2010

Baked pineapple with almonds & honey

Even the most simple dishes need a recipe sometimes. How else are you going to come up with some of these things? Baked pineapple with almonds & honey is, well, baked pineapple, with honey and almonds. There’s really nothing more to it. I found a recipe in a new cooking book I got, and it was called ‘Abricots with honey out of the oven’. These were, abricots, with honey poored over them, almonds on top (I think they should have mentioned this in the title), and then baked in the oven. It seems way to simple to devote two pages of a recipes book to. But then again, I wouldn’t have come up with it unless I saw a picture with such an imaginative title.
The recipe for the baked abricots also metion sprinkling some cinnamon or nutmeg over them. I could of course say I purposefully left this out on my pineapples, but I really just forgot. I didn’t bother looking at the book for such a recipe. The pineapples tasted quite fine and I got approval of my family. I wouldn’t know what it would taste like with cinnamon or nutmeg over it, but feel free to try!

Photobucket
Can you see the heart in the back??!

Ingredients:
Canned pineapple
Almond slices
Honey


1. Let the pineapple-juice leak from the pineapple and put the rings on a baking sheet.
2. Sprinkle the almond slices over the pineapple rings and drop the honey over that. If you have a squirting bottle like I did you can drench it over pineapple rings.
3. Preheat the oven to 150-200 degrees Celsius (300-390 Fahrenheit) and bake the pineapples for about 6-12 minutes until the almonds are golden brown. When done, put the rings on a nice plate and serve!

I told you it’s easy right? It's really nice to serve with some ice cream as well. You can really make this look pretty on a plate! I tried to make the pictures look nice again this time. Hopefully you like them!

Photobucket

A glass of pineapple juice to go with it, my dear?

Photobucket

Photobucket

Photobucket

Macarons

I’ve seen some really beautiful pictures of macarons and really wanted to make them myself. Especially since macarons seem to come in so many different kinds, tasted and even shapes. There’s an infinite number of colours and tastes that can be combined and being able to make them seems to give a lot of space for your own imagination. Plus they look delicious too. There’s only one problem I’ve encounter so far, which apart from finding a good recipe is that it consists out of the almonds. I’ve tried making macarons twice. The first time had completely failed. I over-baked them and they were too dry and burned afterwards, but nevertheless good enough for a cake bottom that next day. Another problem then was the ground almonds. I just chopped them in my mixer, but at some point the little bits didn't seem to get any smaller. The second time, I had almond powder. The problem here was, it was made for drinks and contained more sugar than actual almonds. I just wildly guessed a combination of powdered sugar and my almond powder to make something that looked like macarons and my sister quite liked it. She said it was way better than the stuff we got from the shops, but I can’t recall ever tasting macarons. I should really get some somewhere I think. Try out a few different tastes and see if I can get any farther then. Until then, we’re going to have to do with this recipe!

Photobucket

Ingredients:
45 gram eggs (aged for at least 24 hours)
granulated sugar (no more than 50 grams)
100 grams almond powder
50 grams powdered sugar


1. Whip the eggs with an electric mixer until it’s foamy. Add one spoon of granulated sugar at a time until the mixture is thick, white and creamy like a meringue mixture.
2. Sift the almond powder and powdered sugar together and fold into the egg & sugar – mixture.
3. Use a piping bag or simply spoon to make big dots onto a baking sheet and bake the macarons at 150 degrees Celsius (or 300 Fahrenheit) for about 5-7 minutes.
4. When they’re cooled down, take two macarons of the same size, and royally spread a filling on one of them and put the other on top. Done!

One of the things I totally dislike about this recipe, and I think it counts for all macarons, is that you need aged eggs. You actually have to plan making macarons and can’t decide to make some in the glory of some baking moment you might have. For someone like me that always decides a few minutes before what to make, how and where, this really doesn’t help. I’m glad with they way they came out though, especially since it was the second time and I still didn’t really know what I was doing. Somewhere I still doubt this is the way macarons should be. But the almond powder goes very well with milk as a hot drink.

Photobucket
Can you see the ones I put jam with mascarpone inbetween and the ones with chocolate icing inbetween?

Tips for the macarons:
- Draw identical circles all over your baking sheet – in a nice orderly way – to mark where the macarons are going to be. This will really help if you can’t seem to get the macarons in the same sizes.
- Get some inspiration from places for ideas for tastes and colours and fillings. I like to use flickr to find pictures of things. The recipe I used (and changed quite a lot) came from bakerella. She’s very good at making pictures and everything she makes looks so delicious! I have a whole folder of pictures of things I found on google, flickr or anywhere else with nice ideas and things I’d like to make. Even random pictures of beautiful dresses and flowers can help inspire your bakings. You can never be creative enough!
- You can create little pictures on the macarons if you have two batches of a different colour and apparently you can add little things like lavender inside. (Oh, lavender macarons, that just sounds too delicious.)

Photobucket

Photobucket

Wednesday, September 1, 2010

Little lunch - sandwich mania!

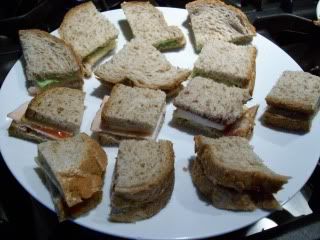
I made this for dinner, to be real honest, and not for lunch. But it would be way more perfect for a lunch or a high tea party. I’ve thought of putting tooth picks or so in them so they’d be easier to pick up and eat. I decided against it as I didn’t have any and I think the little sandwiches might be too heavy for a little toothpick and fall off about immediately.
I made four different types of sandwiches with the things I had in my house. Most of them I already tried a few times before but I did have some help from the sweet Davie and added a new kind!

Photobucket

Tosty-type sandwich

Ingredients:
Cheese (I used some strong Belgium type)
Chicken fillet
Ketchup
Slices of bread


1. Use the ketchup like you would use butter on two slices of bread. Put the chicken fillet and cheese on one of the slices and the other slice of bread on top. Cut the bread into little squares.

Variations:
You can use curry or mayonnaise if you dislike ketchup or completely leave this out if you don’t like it. You can substitute the chicken fillet with ham if you like. Cut the crust off if you wish and cut the sandwich in little squares (or triangles or hearts or just be creative!).

Smoky salmon delight

Ingredients:
Smoked salmon
Lettuce
Cream cheese
Slices of bread


1. Take a slice of bread, spread the cream cheese over it. Smoked salmon on top, cover with lettuce and add the last slice of bread. Cut the bread into little squares and take the crust off if you like.

Variations:
I haven’t actually used cream cheese when I made the pictures, but about every other time I made this I have. Philadelphia (basil) is a nice one to use, but I like to make my own: creamy herb paste.

Cheesy sweetness

Ingredients:
Port-Salut (a soft & mild French cheese)
Berry jam
Slices of bread


1. Spread the jam on one slice of bread and place slices of the cheese on top. Add the other slice on top of that and cut the sandwich into little squares and cut the crust off if you wish. (If you do: the other way around might be wiser.)

Variations:
I used a mixed berry jam for this, but obviously you can change the type of jam. I’d stick to berry-jams, for some reason I cant see mango jam or strawberry jam working with cheese so well. Of course you can also variate the cheese. A very nice combination is Camembert or Brie with cranberry jam.

Tasty tuna sandwich

Ingredients:
Tuna (tuna salad or canned)
Lettuce
Slices of bread


1. Take a slice of bread and ‘spread’ it with the tuna (the tuna, not all the oil or juice). Add some lettuce and put another slice of bread on top. Cut it into little squares and done!

Variations:
I’ve heard mayonnaise goes real nice with canned tuna, so why not add some? If you have al of trouble with the juice or oil when using canned tuna it might be wise to first drain this, before using the tuna. A nice idea is to add a bit of sweet corn

Photobucket

Other nice things to put on sandwiches might be eggs or radish. A combination of blue cheese, pear and walnuts might be nice? Spreading cheese, bacon and grapes? Or cream cheese with strawberries? Ham, fig and lettuce? Eggs, mayonnaise, pepper&salt, maybe some ketchup with lettuce? You name it! There must an infinite number of combinations and sweet things you can put on sandwiches.
If you want to know some nice books for making a high tea or want to know more recipes for little bites and such I’d recommend Susannah Blake. I have two of her books called “afternoon tea” and “high tea party” which are both full of nice ideas for a light lunch with loads of different little bites, or for sweet cakes and cookies for tea or small things to serve on a party. I love the pictures in the book as well and it all looks very –what is the word- posh and rich-like? I seriously couldn’t cook from a book without pictures, even though what I make might look completely different. I need to know what I'm making and I need something to look forward too right?

Photobucket

Wednesday, August 25, 2010

Garlic & satay sauce

It’s still nice weather and during one of the parties we decided to throw in a barbecue. I think my parents had this planned, but I only learned last moment we were having one. I love the way we always take hours to prepare for these things and everyone’s in the kitchen being busy. I made the sauces this time satay sauce and garlic sauce. I never liked satay sauce much, but I can give you a recipe for something that always works. The garlic sauce is the best ever. It owns/pawns/is better than any other garlic sauce I have ever tasted. It makes everything you buy in shops taste awfully chemical to a point of which, I personally, will never even try them again. True story.

Satay sauce (or peanut sauce)

Ingredients:
Satay or peanut sauce mix
Coconut milk (enough to replace the liquid mentioned on the package)
2-4 spoons peanut butter


1. Put everything in a small pan and keep stirring it over medium to high heat till it’s ready! Might be handy to add the peanut butter last, when the rest is thoroughly mixed.

And now to the garlic sauce! I wasn’t really one to like satay sauce anyway, although I do enjoy making it. It’s relaxing to just stand and stir while everyone is getting all stressed around you – because the salads need to be made, everything in the fridge that’s usable for a barbecue needs to be taken out, don’t forget to cut the bread in slices and please get all the cats and dogs away from the food this instant!!!
It’s wonderful!

Garlic sauce

Ingredients:
(Greek) yoghurt
Mayonnaise
Garlic cloves
Parsley


1. Mix the yoghurt and mayonnaise into a big bowl until you feel it tastes just the way you like it.
2. Add the garlic and the parsley (little bit more or less to your taste) and stir it in.

This recipe really depends on how much you want and what you like best. I use a handful of parsley, with about 4-6 cloves of garlic and 8 spoons mayonnaise on 500 grams of Greek yoghurt.

Photobucket

What do you think? Don’t mind the picture so much. I can’t make any “professional” pictures right before a barbecue! But at least you have an idea of what it looks like now.
Next I should try making a whiskey sauce. It’s my favourite after the garlic sauce but due to previous fails from my mom's part (though I think those were something completely different with accidental whiskey in it) I haven’t actually looked for a good recipe yet. It’s a mission again! Perhaps I should make a list of all the missions I still have of things I want to bake – or posts I promised to put up but haven’t yet! Oh, sometimes I’m so lazy!

Tuesday, August 24, 2010

Smoothie madness!

From one madness into another! I’ve been making noodle soup loads last week and I’ve also made my fair share of smoothies again – cuz it’s so lovely with this weather! Then again, it’s very windy and rainy today and I still enjoy my freshly made smoothie!

Creamy lychee smoothie

Ingredients:
6 lychees (half a can)
4 spoons lychee juice
2 spoons grenadine
2 spoons rose lemonade
2-4 spoons mascarpone
a bit of yoghurt and vanilla sugar if wanted


1. Put it in a mixer and mix!

If you’re not so into the creamy stuff or if you don't have any cream cheese in the house (I made the same with créme fraîche and it works fine too!) then you can go for a normal lychee smoothie. Just leave the mascarpone, yoghurt and sugar out – or add the last two anyway if you want. For a different smoothie try the next one. It’s fresh and creamy as well, but perhaps a bit less sweet than the last one. For both recipes it’s about 2-4 glasses.

Pineapple & coconut smoothie

Ingredients:
500 gram can of pineapple chunks
300 ml coconut cream
Vanilla sugar


1. Mix it again! (electric mixer, plug it in, let it do the work – you know!?)

Well, as for the pictures. They come out looking pretty much the same - white thicky liquid, which, now I think of it, sounds pretty WRONG! And since my friend keeps pestering me to write this (no, I didn't quote you) this will be quite a short blog again! I hope you enjoy the smoothies and maybe come up with your own combinations! Oh, and grapefruit with cucumber isn't such a success so far.

Photobucket

Thursday, August 19, 2010

Noodle soup madness

Noodle soup! Who hasn’t had it and who doesn’t love it? It’s lovely to just add boiling water to a package and enjoy the soup without having to go through the effort of cooking. And it’s quick too!

Ingredients:
Noodles
Broth
Baby corn
Mushrooms
Leek
Runner beans


1. Put the broth in a pan on low fire together with the noodles.
2. Cut the vegetables in small pieces and add to the soup. Wait until everything is cooked and that’s it!

If you want to add chicken I’d advice you fry the chicken first on a low fire – make sure it doesn't burn!- and add it after. Of course there’s loads of other stuff you can add and leave out. Used this recipe loads in the week my parents were off and the rest of the family felt like eating simple things – and when they didn’t they just wanted my soup! It’s always nice when people appreciate your cooking isn’t it?

Might seem like a bit of a simple thing to add to my little database of recipes, but it’s something that needs to be remembered – I have a whole arena of people backing me up on this! The nice thing is that we grow quite a lot of vegetables and herbs in our garden, so half of the vegetables came from there. I should write a recipe with some of the lettuce we have in our garden. I was thinking of strawberry and other fruit with lettuce salad and then the strawberry vinegar I have (but have not yet tasted) over it. Anyone ever had strawberry vinegar and knows what goes well with this? I’ve never actually heard of this until I got it.
- Oh, and do we actually need pictures of soup?

Photobucket

Sunday, August 15, 2010

Coconut rice with peach

I’ve been getting way too far behind on posting. But I did manage to post at least once a month so I suppose that’s something to be proud of!
One recipe I’ve made a couple of times since my last post, and I suppose some before as well, is coconut rice, preferably with some peach. There’s no rice that can top the creamy-fresh taste of coconut rice with some fresh-fruity peach. Risotto (rice boiled in broth) might be next in line.
Anyway, the recipe for coconut rice is quite easy and if you can make rice. You can make this!
Unfortunately I can't see much about the amounts needed. I never pay attention to the amounts needed. I always take as much rice as I think is enough and make sure the water reaches about double as high as the rice. Then my ricecooker does the rest! And well, we can never have enough peach can we?
Note: I’ve substituted coconut milk from a can with powdered coconut cream before and it works just as fine. Anything coconut you find I suppose will work, dessicated coconut however, will not really have the same effect. - Oh, and I hope you’re smart enough not to put in whole coconuts?

Photobucket

Ingredients:
Rice
Coconut milk
Peach (preferably canned)


1. Wash the amount of rice you need before using. Add the coconut milk until you have reached the amount of liquid needed to boil the rice. Add water if you do not have enough coconut milk or you feel it is too thick. Then cook it!
2. Cut the peach into little chunks and mix these through the rice. If you want, you can cool the rice slightly beforehand.

And there you go! A lovely recipe in just two steps! I hope you enjoy!

Photobucket

Photobucket

P.S. I've hit the 50 posts! hurray! Maybe when I reach 100 I should post something grand eh? Ah, that reminds me, blogger has some nice new templates, I might actually change the way my blog looks and make a new title-picture. What do you think?

Sunday, July 4, 2010

Strawberry Smoothies

Ah, I haven’t posted anything in waayyyy too long again. But at least I update monthly right?
I’ve been really busy last month, so haven't been able to do much in the meanwhile. I haven’t tried any big recipes, but I did get around to doing some easy things that just can’t ever fail!
Let’s start with something that everyone has to like, especially in these hot summer days: Smoothies. They’re fresh, they’re fruit, they range from sweet to fresh to bitter even and you can put anything you want in it! I used to go by the same basic recipe a lot, something I just made up myself because it always works out nice. I’ve tried some complete different recipes too, but for today I stuck with my basic again, so here goes, the simplest smoothie recipe ever!

Photobucket

A little note on the ingredients: I have no clue how much I exactly used, but I tried ordering them to the amount. It really depends on what you like. If you want a thicker smoothie, use more yogurt and even leave out the milk, if you don't then use more milk. If you want a nice full taste use full yogurt and milk, or use the diet-version if you want a little less calories. You can leave out any sweeteners I put in as well, like the jam and sugar. And you can try out millions of combinations of fruit, or add things like raisins and nuts. (Apple, raisin and banana is GREAT – as soon as I make that again I’ll post it WITH measurements, to make it a bit easier on you!)

Ingredients:
Yogurt
Milk
Fruit (just strawberries in my case)
Jam (or lemonade)
Lemon juice
Vanilla sugar
Decoration like left over fruits, umbrella’s and the likes


1. Just put everything in a mixer or blender and let modern technology do its work! I would add sugar and jam later, since it might get too sweet or you just want to leave this out after all.
2. Add more or less of any of the ingredients while tasting it in between, poor it in glasses and decorate them and voilà!

With the measurements I used I ended up making two glasses. This wasn't much of a problem, since we were with three people and the glasses were quite big. I left one glass for my sister and when I came back downstairs she asked me if there was any more for her. Always good to know people like what you make right?
I hope you like the recipe! I’ll make sure to add some measurements next time and make the recipe a bit more specific. Ah, if you come up with your own combination of fruits, I’d love to hear!

Photobucket

Photobucket

I do hope you enjoy the pictures! I’m kind of proud of them! And kind of have no idea which ones are nice and which ones aren't, so I guess I ended up showing too many, especially for such a simple recipe!

Photobucket