Tuesday, March 29, 2011

Chocolate cherry cake with fudge frosting

What’s with people and somehow always saying ‘yes’ when asked to do something? At least half the people I know have this same damned problem! You get asked to bake cakes for a party, and somehow the answer ‘yeah sure, dun worry, would LOVE to’ comes out of your mouth. Suddenly I’ve forgotten the hell I’ve been through trying to organise a high tea for christmas and start organising the cakes I have to make. Luckily halfway you hear you have to make 3 in stead of 4 cakes, which saves you some trouble. No one’s helping you when they give you ‘ah, just make something. I don’t mind what you make’ and all your suggestions end up in ‘oh, that sounds nice!’. So basically, there I was, the idiot that said yes to making three cakes for a weekend inbetween all the essays, exams and presentations that also needed work. I didn’t particularly feel like making anything too special or too creative, so here was what I decided on: my special rich fruitcake (secret recipe!), a chocolate cake (cuz everyone loves chocolate) and cake with.. whipped cream? (cuz that’s simple!)
So here’s my first brilliant idea: chocolate cake, with cherries and chocolate fudge frosting and decorations to make it look less boring!
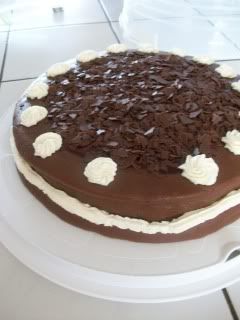
Photobucket

Note: I made two large cakes (24 cm?) and put those on top of eachother. So, I used the recipe twice. Just once, the recipe should be enough to conver two 18-20 cm (7-8 inch) cake tins.

Ingredients:
5 eggs
175 gram caster sugar
50 gram flour
50 gram cocoa powder
75 gram butter


1. Whisk the eggs and the sugar until the mixture is thick and pale (5-8 minutes).
2. Mix the the flour and cocao powder together and sigt it over the eggmixture. Fold in gently. (I do this in 2-3 additions, because somehow that works for me)
3. Melt the butter and sprinkle it over in drops and fold it in. (This takes about 5 additions)
4. Pour the batter into a large tin, or devided it between two smaller ones. Make sure the tins are greased.
5. Heat the oven to 180 degrees Celsius (or 350 Fahrenheit) and, once preheated, leave the cakes in for about 24-30 minutes.
6. Leave the cakes to cool for a while before we get to the decoration!

Fudge frosting Ingredients:
50 gram chocolate (dark and/or milk)
50 gram butter
3 tablespoons milk
1 tablespoon vanilla essence
250 gram icing sugar


1. Put everything, except the icing sugar, in a pan over a fire and wait till everything has melted and is stirred together (dont wait for it to stir together, put some actual effort into this part).
2. Add the icing sugar to thicken the mixture – and for more sweetness. I felt I needed it all, but perhaps you decide a bit less will do as well (if you use less than, say, 200 grams though, the frosting will never get thick again).
3. Leave it to cool slightly and spread it over the cake
Note: Be quick on the spreading! In my case the frosting started to harden real fast and it was a real pain spreading it over the cake.
More notes: I had to use 2,5 times this recipe to cover my cake. When you chose to double the ingredients, you dont have to double the amount of vanilla essence, the essence is strong enough to use only once.
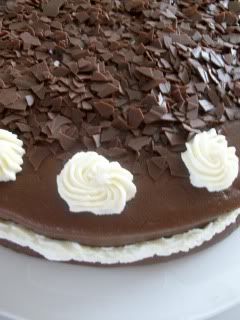
Last note: before we start on this lovely frosting, make sure to level the cakes by cutting oddshapped tops off with a scewered knife, place one of the cake upside down on a tray, spread cherries over that, place the other cake upside down on top of that, THEN use this frosting. (You can also use the frosting as a dam to keep the cherry filling where it’s supposed to be. For this, just make an outer circle of frosting on the bottom cake and put the cherry filling into that).
Photobucket

Decoration Ingredients:
Whipping cream
Sugar
Cherry filling for pies
Chocolate sprinkle things


1. Before decorating spreading the fudge frosting over the whole cake, make sure to have used the cherry filling for inside the cake. (See about three sentences back on how to do so.)
2. Then we use the fudge frosting and leave it to cool. Hopefully you have some of the jelly from the cherry filling left: spread this over the top of the cake in a big circle, leaving a bit of the edge free.
3. Sprinkle the chocolate sprinkles over the jelly (the main purpose of the jelly was to make the chocolate stick!).
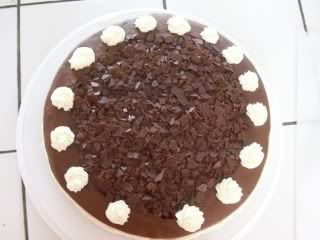
4. Before you serve the cake, whip the whipping cream until stiff. When stiff, whip in the sugar until you like the taste. Then decorate the cake with an edge around it and puff circles of cream around the edge you left before. And Tadaa! Done!

Note: Make sure to do the whipping cream last and before serving. Whipping cream tends to go off quite fast.

Last note: This cake is really rich! I haven’t been able to taste much myself – I think I had just one bite. But my sister and nieces had a piece and they both decided on an extra large piece because the cake looked good (thank you, thank you!), but both ended up leaving about a fourth of the piece they took because it was too rich and they just couldn't eat any more. Everyone said it was delicious though. I wasn’t exactly prepared for the rain of compliments I got that day. For some reason everyone felt the need to say the cakes were delicious at least once, or in my mom’s case at least a million times including an order to make a cake again for her birthday! So next up, my mom’s favourite cake: Lemon cream cake. Okay, so I haven’t exactly decided on the name yet, it has my homemade lemonjam in it, it has cream cheese in it, it has whipping cream all over it, it has royal icing decorations I made and it’s really just plain sponge cake. Any ideas?
Photobucket

Thursday, March 17, 2011

Memories of Italy

My vacation to Italy was in 2009, so it’s been quite a while. But since I’m going through a lot of old pictures, it doesn’t hurt to post these anyway.
Though it was over 40 degrees Celsius there half of the time, I died of boredom at some points and I was constantly dying a long agonizing death – this vacation was quite memorable. Not in the very least because of walking with the dogs in that area, which resulted in having bats in my hair! Okay, so not quite that literally, but it must’ve been close! I swear those things don’t watch where they’re going, but they make cute sounds and seeing them shoot all over the place is quite funny. Also, the roads there were deadly! The road to the house we rented was a wobbly, circling road of nothing but sand sand and sand. I remember some of the places there and what it looked like and cute cities with loads of small rounds and fancy little tourist shops or even the musea we went to. Also – which I doubt many people would – I remember supermarkets and food! You find so many things in there which you just HAVE TO try!
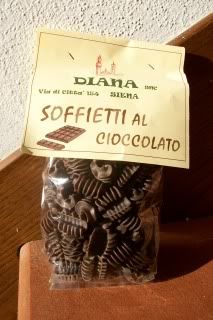
For instance: chocolate pasta! Way to go if you can resist this!

Photobucket

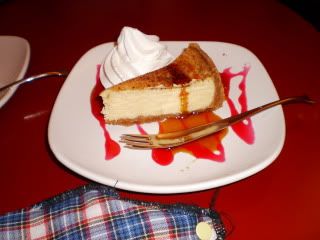
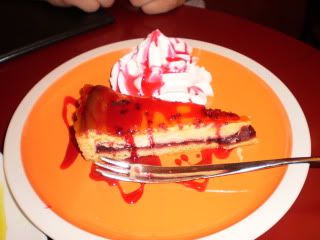
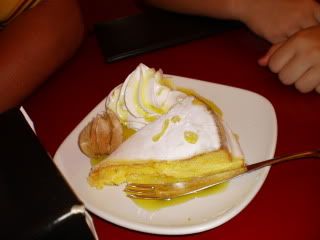
I’ve made quite some pictures of just ‘normal’ groceries that I couldn’t resist. It’s also where I learned of Chocolate with Salt (Lindt). Don’t have a picture of that either, although I kept the package (I have an obsession with packaging T.T). Here are some pictures I wanted to share though. Made in a very lovely teahouse/coffeshop (not by dutch standards) which had a really sweet interior and was very quiet compared to the stamped full city. I probably don’t want to know how much money we spent there, but here’s some of the treats we had:

Photobucket

Photobucket

Photobucket

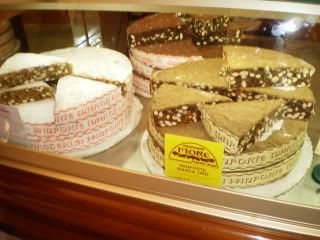
I’m guessing one is some sort of cheesecake, the next something with berries and the last has something to do with lemon. I really wouldn’t know, I doubt I knew even if I had the menu now. Now for the panforte we had at some point as well. Damn, I love panforte! Too bad it’s so very expensive here when you have to buy it from italian specialty shops. Together with the nougat you can buy there, I bet they must be my favourite italian sweets.

Photobucket

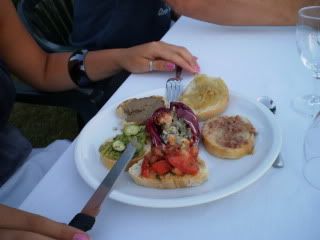
Here you see one of the courses we had at a wine shop (my parents would go all over the place to taste and buy wines and oils). Aren’t these called bruchetta? I believe one has paté on it, one with sweetened unions, something with cucumber, one with tomatoes and oil and the last Im guessing was ham or bacon. Wasn’t bad, except that we all hated the paté.

Photobucket

Last picture from my collection: us at a restaurant. Eating pizza, cuz you can’t go to Italy and not eat pizza! You just gotta love messy full tables, with everyone eating their food, or -like we like to do- eat eachothers food too. Enjoy!

Photobucket

(It's a miracle I remember so much about something so long ago!)

Kitchen cleanup

When going through all the pictures I have on my computer (Details: 1,55 GB, 2.492 files, 7 folders). I noticed a few things I’ve never posted. I think I mentioned it before, and sometimes I just forget recipes, don’t have time or just hate pictures to much to dare post m. There are a few things I’ve found worth mentioning, but of which I’m really not going to post any posts with full recipes anymore (mainly because I forgot).
So here’s a quick look at things I haven’t posted yet!

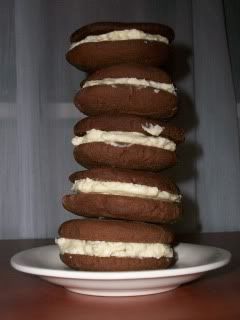
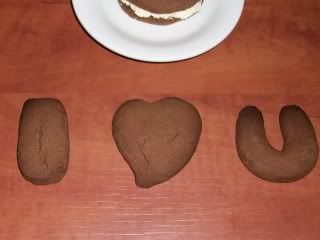
Perhaps this was an attempt of mine to create a whoopie. Basically it was chocolate cookies with buttercream inside (in case it wasn’t obvious enough). I’ve completely forgotten the recipe I used for this. I can’t remember especially liking these either – I mightve burned m a bit. Plus when you try to bite, Im sure cream came out from all sides. But I did manage to make a pretty funky tower from it.

Photobucket

Photobucket

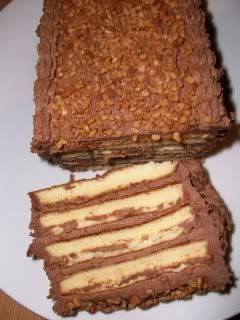
This was a pie I made for someone’s birthday I think. It was a last moment thing. I used a spongecake that I cut in four pieces and stacked with what I think is buttercream with caco between it. On top is nougatine! I remember this being really nice, but I never found the pictures nice enough to make a post.

Photobucket

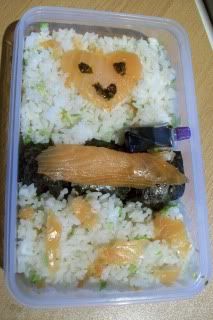
This is one of the first attempts to a bentobox I made. I thought it was really nice to eat, and I’m still quite proud of it. It has rice, chives and smoked salmon in it for those who think it looks really nice as well!

Photobucket

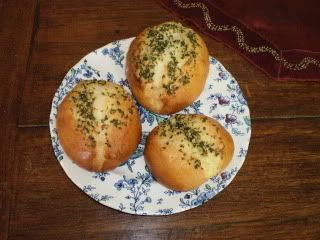
These are one of my first attempts to making buns. There’s a butter/herb filling on top which, if I remember well (the picture is from 2009) didn’t stand out enough for me to really like it. Perhaps I should try this again with cheese buns, filled with cheese, then with this paste on top. The recipe came from Happy Home Baking.

Photobucket

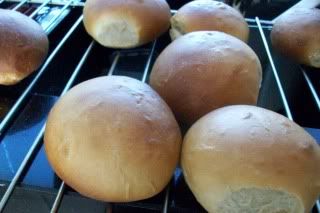
These honey buns also came from Happy Home Baking (back from when I was completely addicted to her site and SO jealous of it). A pretty good attempt, the tecture inside was perfect. Everyone was proud of me, somehow I decided they weren’t perfect. I can’t even remember why!

Photobucket

That’s about all I could find for now! I’m still not through all my pictures, and I keep adding more every time. So I should really keep on posting!!

Chocolate fondue feast!

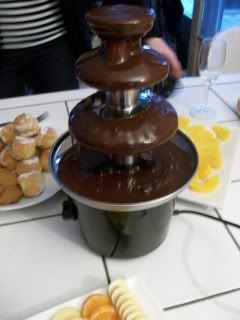
I suggested to make dinner some time last week, but wasn’t into make some meat, vegetables and done! So I decided to make a chocolate fondue! Perhaps not the most responsible, healthy dinner, but for one night it was really worth it. My mom initially didn’t want to join and made some soup for herself, but when me and my sisters were gathered around the table eating and chatting, she couldn’t resist. What woman couldn’t resist chocolate anyway?

Photobucket

How did I make the chocolate? Before pooring it into the chocolate fountain I melted it in a pan with about 150-200 ml cream. The cream was just to make the chocolate more fluid and easier to poor and it wouldn’t damage my pretty fountain, but just keep flowing. This way, I suppose I made ganache rather than chocolate.

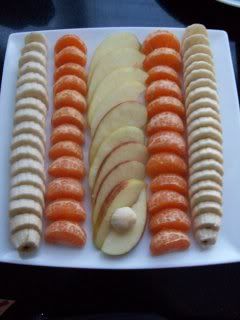
I went to the supermarket that same day looking for nice things to add to the chocolate. Here’s what I came up with:
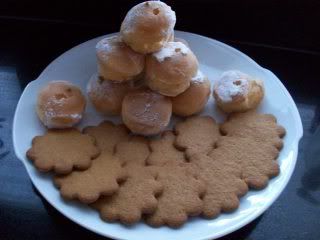
- Profiteroles
- Spiced, almond cookies
- Banana
- Oranges
- Apple
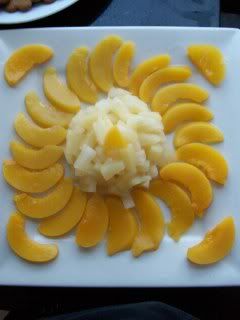
- Pineapple (canned)
- Peach (canned)

I decided I shouldn’t bring too much, because I doubted we’d eat it all. I tried sticking with a lot of fruits as well, to make this a somewhat healthy dinner. I would’ve liked to add minimuffins and sprinkles to go over those, but of course I couldn’t find those when I needed ‘m!

Photobucket

The spiced cookies were the greatest succes - I’m glad I bought those. I hadn’t actually ever tried those, as they are a more expensive brand and they were gone in no time! People even started eating them without chocolate. One of my sisters was completely obsessed with banana and chocolate, while I ate practically all the peaches myself. I think in the end the only leftovers we had were a few pieces of apple and pineapple. The rest was all gone! I didn’t do a bad job then did I?

Photobucket

Photobucket

Lemons in olive oil with cumin twist!

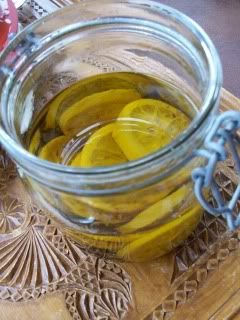
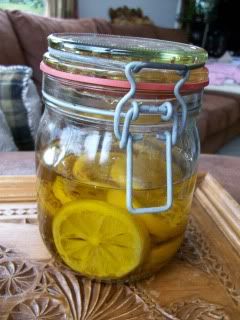
Here’s something I made a while ago: a way to preserve lemon. Basically it’s just a way to give a bit of extra taste to olive oil and to make yourself delicious lemons for on fish or the likes. One thing I’d advice anyone who uses olive oil a lot is to give it an extra taste. With all the herbs we have in the garden, we tend to just throw a few in the olive oil bottle – or any cute jars to put them in. But we’ve also added a lot of garlic, or little peppers work too. Anything that can give it a bit of extra flavour! Normally you leave it for a few days to a week before it’s fully absorbed the flavours, but we’ve used it the next day as well. Works for us.
Now back to the lemons!I think I found the recipe on a site for Dille & Kamille (such a pretty shop!). I’ve made it for my mom in the hope to make her happy, but apparently it looked like I only wanted this for myself. There goes your good intentions! We’ve had it once on fish and it was delicious! And I have to admit I hate fish! Never add too much though, at some point I was eating lemon with fish, which can make your face look really odd...

Photobucket

Ingredients:
2-3 lemons
200 grams coarse/rough sea salt
3-5 spoons cumin seeds
olive oil


1. Cut the lemons in thin slices. Take a bowl or oven tray and cover the bottom with salt, then cover the salt with lemons, to cover those with more salt and then more lemons and even more salt. Basically you’re making sure all the lemon is covered in salt.
2. Leave the lemons to soak up the salt and the salt to soak up lemon for about a day. After a day brush the salt off the lemons. (You can wash them as well.)
3. Dry the lemons with kitchen towel and leave them a few hours to dry some more.
4. Take a pretty glass jar and sprinkle some cumin seeds on the bottom, then add a layer of lemons. Sprinkle the lemons with more cumin seeds and keep stacking layers of lemon and cumin (like with the salt before).
5. Then poor over the olive oil till everything is soaked and drowning and close the lid. Leave it for about a week or two before using it.

Photobucket

A little note on the washing and drying of the lemons: make sure the lemons are not wet when you add the water. Water and olive oil don’t mix, and this can have a pretty nasty effect. I have not completely understood the purpose of the salt. Perhaps it’s just to soak up most of the lemon juice, instead of giving the lemon extra taste. Who knows?
Well, hopefully you can enjoy it! Especially if you like fish, you should try this! Until next time!

Late note: The lemon taste of the oil get's really strong after a while, which actually makes it really nice as well. Also, I've been ordered to make more!

Sunday, March 6, 2011

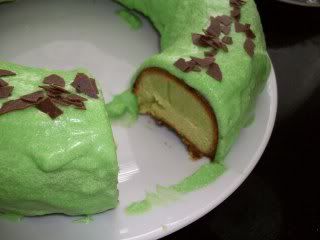
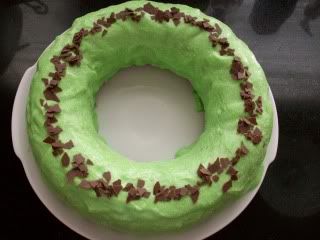
Coconut icing on pandan cake

Photobucket

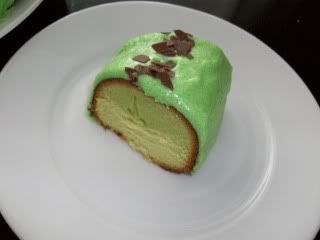
It’s a little while ago since I made this pandan cake for a party, but I’m always late with things. And I feel the need to memorize and share this icing. I heard about the icing from some site, but forgot to write the recipe down. I just came up with something new myself and I’m pretty sure it has nothing to do with the recipe I saw anymore, but it was delicious anyway. The pandan cake I made was from a package (add water- done!) since I wouldn’t know where to buy any pandan flavouring here or even how to make the cake to be honest. I like the smell and taste of pandan, so I decided my family was going to eat it on the party. Since just cake would be plain, I looked some icing up to go with it and that’s where I got the idea! So here goes:

Photobucket

Ingredients:
Coconut cream/milk
(Whole) Milk
Powdered sugar
Food colouring
A cake (like pandan)


1. Use as much coconut cream or milk as you like and add milk to make it a bit smooth and thin, only when needed. Add food colouring at this point if you want (especially since some coconut cream has such an undesirable colour).
2. Add the powdered sugar until it is as thick as you want (thick enough to spread, maybe to poor, don’t make it too thick!).
3. Use it on the cake! Done!

It seems fairly simple and contradictive. Perhaps I shouldn’t have added milk, but it was hard to add powdered sugar to something that was half solid anyway, so I used the milk to smoothen it up a bit first. For the simple part: icing should never be complicated. Once icing get’s too complicated to make, I’m gone. I mean, after all the time I spent on making a wonderful cake, should I seriously spend forever on icing? Don’t forget icing is important though. Cake without icing is like.. life without sweets?

What is it like anyway?

Photobucket

Saturday, March 5, 2011

Peanut butter & Jelly bites

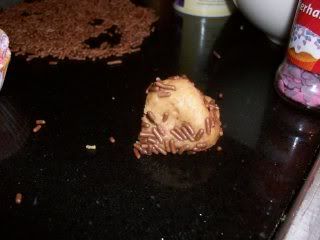
You know when sometimes it’s a nice day and you feel like you HAVE TO bake? Happens to me sometimes, and today was one of those days. Only, we were out of flour, which I needed the day before when I made crème brûlée. Plus it was already kind of late, so I wanted something easy to make. First thing to mind would always be cakepops, bonbons, or anything that’s little, chocolaty and sweet! I first thought of the peanut butter balls I made with christmas, then decided peanut butter and jam would be nice. And rolling them in chocolate sprinkles, cuz I didn’t actually want to go through the effort of melting chocolate. (I wanted to bake without doing something, you feel me?)
My first attempt failed miserably.

Photobucket

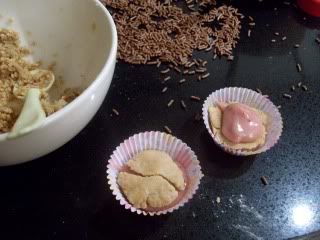
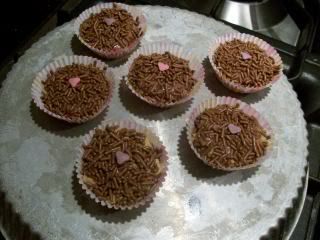
Then I decided to reorganize and make Peanut butter & Jelly Bites aka a layer of peanut butter-mixture, then jelly/jam, then peanut butter again, then more jam and on top loads of chocolate sprinkles! It didn’t turn out that bad..

Ingredients:
Peanut butter
Jam/jelly
Powdered sugar
Cookie crumbs (or just more powdered sugar)
Chocolate sprinkles
Butter (if needed/wanted)


1. Melt the peanut butter in the microwave in less than a minute. It’ll turn soft and liquid-like.
2. Add powdered sugar and cookie crumbs until the mixture becomes thick and knead-able. Add some melted butter if you made the mixture too thick.
3. Do the same with jam and powdered sugar. (I left this slightly more liquid)
4. Take little mini paper cup and fill it with peanut butter-mixture for the bottom layer. Then add a layer of jam-mixture, then more peanut butter-stuff and then more jam.
5. Last but not least, sprinkle it with chocolate sprinkles. Leave it in the fridge to harden, and done!

Photobucket

Unfortunately I can only tell you how I made them, and with what, and not with how many of that what. I just randomly took some ingredients and made the best of it, so I would have no idea how much you need. They tasted quite fun! Exactly like peanut butter and jelly would taste if it were peanut butter and jelly. It’s just too bad eating too many makes me feel kind of sick.

Photobucket

I added a heart to it as well! Because somehow I felt that would just make them a lot better. It reminded me of Valentines like that. Which reminds I should really say something about blogs that completely inspire me (and make me jealous but that’s a different point; also don't ask how valentines reminds me of blogs). Here are a few:
http://diamondsfordessert.blogspot.com/ - She’s one of the most creative bakers I know. Everything she makes looks so wonderful and cute! You’d almost not want to eat it.
http://gordongossip.blogspot.com/ - This blog is like a collection of all the heavenly things put together. I don’t know how the writer finds all these things, but I find myself drooling and hoping to have some about every time.
http://happyhomebaking.blogspot.com/ - I feel she’s been slacking lately, but this mom defintely knows how to cook/bake!
http://www.threebakingsheetstothewind.com/ - The last lady knows how to turn movies into food. She’s into food, beer and films and she knows exactly how to use ‘m (all at the same time)!
Hope you enjoy! ‘Til the next post!