Monday, December 31, 2012

Peanut butter whoopie pies


Have you ever had a day in which there was no special reason to bake? Maybe you didn’t have all the motivation and enthusiasm in the world? A day in which you just took one of your cooking books, pointed at a recipe and said ‘I will make this.’? I had that kind of day when I made these peanut butter whoopie pies. It was a not-too-special-but-nice-enough day off without much to do for me. So I took one of the newer baking books I have, opened it at a page I marked at some point and decided: this is it. Today, we’ll be making peanut butter whoopies.

Ingredients:
225 self-rising flour
50 grams cocoa powder
250 grams butter
100 grams dark caster sugar
7 grams (1 bag) vanilla sugar
2 eggs
125 ml milk
Peanut butter, powdered sugar and butter

1. Sift the flour and cocoa powder together.
2. Mix the butter with the sugars until creamy.
3. Mix the eggs into the butter, one by one.
4. Add the flour mixture and lastly the milk. Mix until no lumps are left.
5. Use spoons or a pastry bag to make circles on a baking sheet. Flatten the circles a bit. Watch out them too closely together as they will rise and set out a bit.
6. Preheat the oven to 180 degrees Celsius or 350 degrees Fahrenheit. Bake the whoopie pies for about 15 minutes, until fluffy but firm.
7. For the frosting between the cakes I used butter cream frosting I had laying around and added peanut butter. I believe I ended up with 1 part butter cream and 1 part peanut butter mixed.
8. Take two whoopie halves of about the same size and dump a lot of peanut butter frosting in between. 


Okay, perhaps not THAT much! You’ll notice as soon as you take a bite, the frosting will squeeze out from between the layers of chocolaty cake. But no need to worry: this only adds to the joy of eating whoopie pies. These whoopie pies, slightly dry because of the amount of cocoa powder, really made me crave milk. At the same time, the peanut butter filling made me just crave more, especially more peanut butter filling. I’m sure it’s not that strange to want milk after chocolate cakes or to always want more (peanut) butter cream. I really hope you enjoy this fluffy cake with its soft filling, because even on those days that don’t seem special at all little things can make the difference. Just like for me, on that not-too-special-but-nice-enough day off, the knowledge of baking something right and secretly being able to nom one chocolate cake sandwich filled with peanut butter sin after the other made it all worthwhile. Forgive me my language, but I’m pretty sure peanut butter is one of the eight sins.
I hope you enjoy this recipe and, considering the date I’m posting, I wish everyone a Very Happy New Year!!! (may we find many more sins and uncover secret recipe treasures!)

Friday, December 21, 2012

5-minute brownie in a mug!

This is the best recipe I can give you for a Christmas dessert in a pinch. It’s an absolutely amazing brownie in a mug and it really takes no more than 5-10 minutes. Serve slightly warm with whipped cream and sauce and you’ll be sure to make everyone ‘wow’ at your creation and no one will ever know how easy it was. Unless you do tell them you made it in 5 minutes and I bet they’ll still be just as amazed.


The first time I made this my sister stared at me while I poured all the ingredients directly in a large mug. She insisted I lost my sanity. And to be very fair I felt a bit silly as well. Somehow the idea of making a cake in less than three minutes in a microwave just made no sense. After mixing the ingredients, I popped the mug into the microwave and stared at it. I wasn’t too surprised when it started rising, I did after all put self-rising flour into it, but it did rise very high. I also wasn’t too surprised nothing exploded, but I did stop the microwave several times to check. I even wasn’t all that amazed when I took the mug out and the brownie turned out to be a shiny exploded chocolate mess. But I was totally surprised when I took a bite and it had the taste and even consistency of real brownies! It was amazing how it turned out that sweet in such short time!

Ingredients:
4 tablespoons self-rising flour
4 tablespoons sugar
1 egg
3 tablespoons cocoa powder
3 tablespoons milk
2-3 tablespoons sunflower oil
3 tablespoons Nutella
Whipped cream
Caramel or chocolate sauce

1. Put all ingredients in a bowl, or directly into a mug, and mix it with a fork until there are no lumps left.
2. Pour it into 2-3 mugs. The mugs in the pictures were filled for about three-quarters. If you don’t want the brownie to poor over the mug, you’ll need to fill it no more than halfway.
3. Stick the mugs into the microwave and microwave on the highest setting for about 2-3 minutes. You might need a bit longer or shorter depending on the wattage of your microwave.
4. Top the brownie-in-a-mug with whipped cream and caramel or chocolate sauce and enjoy!

You might want to leave it for a few minutes, just so the brownie is cool enough to eat. This way your whipped cream won’t immediately melt as well. Also, I personally totally love the way the chocolate drips from the sides, but if you'd like your brownie to look a bit cleaner fill the cup for no more than halfway! For Christmas I’ll be serving this in tiny cappuccino cups with a little ball of ice cream to the side. I can’t wait for the Christmas dinners! There’s so much food I get to try and show off. 


Of course, now I know how to make these brownies-in-a-mug, I’ll have to start experimenting. I already thought of adding chocolate chips or fudge bits. The very thought of it makes me drool! I also have to start making a white chocolate version. Or how about a gingerbread-version? Do you think I can substitute the Nutella with jam? Since the recipe is so easy I’ll be sure to get down to it soon. I also won’t have to worry about wasting a lot of ingredients!
Thank you for reading again and please leave comments if you're equally amazed, you experimented with this as well or just random! Merry Christmas and a Happy New Year! Enjoy!

Wednesday, December 12, 2012

Mitarashi Dango

Dango, for me, was one of those things that I keep bumping into but never got the chance to taste. It’s just like the Chocolate Eggnog I posted before. I don’t live in America and it’s no tradition here, so I’d never tasted it. The same way I don’t live in Japan and there’s no way you could find a place that sells dango here. Which means at some point, you’re just going to have to make it yourself! I finally got the ingredients together, but when I looked up the recipes I was convinced it was going to turn out to be a disaster. To start off with: are dango boiled or steamed or grilled? I’ve found so many different recipes and not one of them could agree on any single aspect of the recipe. So I just went with one that I felt most comfortable with: Mitarashi Dango.
After following the recipe and tasting the dango I suddenly had a whole range of questions. For one, are dango supposed to taste that floury? Or, when and how do they eat dango actually? What size are they? Do they add colour and/or taste to the tri-coloured dango you see sometimes? And lastly: how did such a plain floury ball come with such a lovely sauce?


Ingredients for the rice balls:
100 grams rice flour
100 grams glutionious rice flower
2 tablespoons sugar
150 ml warm water

Ingredients for the sauce:
5 tablespoons sugar
1 tablespoon soy sauce
1 tablespoon mirin
4+1 tablespoons water
1 tablespoon cornstarch

Making the rice balls:
1. Sift the flours and sugar together.
2. Stir in the warm water and knead until you get a soft and smooth ball of dough.
3. Divide and roll into little balls the size of a bottle cap.
4. Boil water in a large pan and add the rice balls as soon as the water boils, preferably at once or shortly after eachother.
5. Wait until the balls start to float and leave them to boil for another 1-3 minutes.
6. Take them all out and put them into icewater to stop the boiling process.
7. Drain the balls well and skewer 3-5 balls on a skewer. Grill them at this point, if you want.

Making the sauce:
1. Add the sugar, soy sauce, mirin and 4 tablespoons water together in a small pan and bring to boil.
2. Add one tablespoon water to the cornstarch and stir. Add the mixture to the rest in the pan and stir until it dissolves.
3. Take the sauce off the fire when it’s thickened, or at least before it burns!

Assembly:
1. Pour as much sauce as you can over the dango. In this case, more is better! Then you’re done. Make sure you eat most of it before anyone else has a chance to taste!

Now that you finished making the recipe: didn’t kneading the rice flour dough feel amazing?! I’ve never felt anything like it. It was like using paper clay. I might have kneaded it more than really necessary just because it felt so nice.
Also, I tried to find reviews of what dango really tastes like. It tastes like floury balls! I’m glad I totally nailed it at that point. It’s also supposed to be slightly sweet, but I can’t remember if it did through the overload of sticky sweet sauce. The sauce, I found out, wasn’t thick enough, but it sounds like it had enough of the sticky and sweet. I haven’t been able to find an answer to my boil, steam or grill question though, but I can tell you they’re eaten all year round, they’re supposed to be smaller than I made them (bottle-cap size), the tri-coloured dango are flavoured with a colour as side-effect (red bean, egg and green tea) and the lovely sauce is there just because we like it!

Sunday, November 25, 2012

Chocolate Eggnog

My mom keeps buying me lovely things for my baking and photography. A little while ago she brought me a tin box with recipe cards in it. The tin box was ‘covered’ in chocolate shavings and cacao and every single recipe included chocolate. So I sat down and picked some things that looked interesting. One of them was a chocolate drink that included egg. I don’t think I ever had egg in a drink so I thought it was funny enough to try. Before I even tried it I heard it was a chocolate version of the famous eggnog! I got totally exited! Do you have any idea how many times I’ve seen eggnog in movies and on pictures or heard about it from people? I never got the chance to drink it myself!


So I made it. As soon as I possibly could! And wow! It was like drinking chocolate mousse, so fluffy and chocolaty and oh, just lovely! I thought it was amazing. I wonder why we haven’t invented this here in Holland yet. Also, something I never knew: when making or drinking this you’ll notice it’s cold. It’s supposed to be a cold drink. For around 4 people in case anyone is wondering.

Ingredients:
3 eggs
350 ml milk
60 grams cacao
60 grams sugar
Whipped cream
Chocolate shavings
Sugar for the rim of the glasses

1. Separate the eggs. Take the egg yolks (yellow) and mix them in a bowl until creamy.
2. Put the milk with the cacao and 40 grams sugar in a pan over medium heat and stir until dissolved. Make sure the milk doesn’t boil or burn!
3. Add one or two spoons of the hot milk to the egg yolks and stir immediate. Then poor the egg yolk-mixture into the pan with milk and keep stirring on medium to low heat until the mixture thickens. Take the pan off of the heat and leave to cool for about 30 minutes.
4. After 30 minutes, take the egg whites and mix them until fluffy and stiff. Add 20 grams of sugar and mix again.
5. Use a spatula to stir the fluffy egg whites into the chocolate mixture.
6. Poor the eggnog into glasses (with a sugar rim) and top it with whipped cream and chocolate shavings. 


For anyone who doesn’t know how to make that pretty sugar rim on glasses: really all you need to do is dip the rim into water and then dip it into sugar. You can add cinnamon or cacao to the sugar beforehand to give it something extra!

While making these pictures I tested a new technique for the background. I used one big cloth for the bottom and the back of the picture. It’s a pretty odd setup and even though you can quite obviously see the creases of the cloth (if you look at the background and not the lovely drink), I was satisfied with the result. I thought it gave the pictures a nice feel. I hated the fact that I used glass though. To be fair, I insisted on using glass, because it would nicely show off the chocolate ‘mousse’ together with the whipped cream and it did look lovely. But once I took a picture: look at those reflections! They were everywhere! There was no way to get rid of them either! 


I hope you enjoyed my explorations of new recipes and photographing techniques and I’ll make sure to post more soon! For those reading this around Christmas (it is, I believe, a traditional Christmas drink): Merry Christmas!

Friday, November 23, 2012

Showing off 2: Out of the blue

There’s more pictures I can show off! Aren’t you excited? Since I’ve slowly been getting into photography more and more, I bought myself some new plates. Also my mom, who works in some sort of second hand shop, bring home a lot of odd pieces of kitchenware. It’s amazing to suddenly have so many options to start combining!


I bought a new plate, just one and nothing to match it. Everyone in the house thought it was the ugliest thing I’d ever bought. Personally I had to agree there’s no way I’d serve food on a plate like this. Not just because it’s an odd colour and design, but it’s also too 3D. Every line you see actually pops out quite a lot. But blue contrasts so nicely with orange and yellow! I mean, look at those colours popping out and screaming of colouriness!


 Even when mixing with other colours I think it turned out well:


So, that was me experimenting with more props I have now. I could show you a whole lot more, but I think I'll leave you wait for most of the pictures until I actually post the recipes. But I can share two pictures I wanted to use for a post on Frappé. I never got the pictures right though.


I mean: look at that! Who ever thought of photographing an ice coffee from above? There's not going to be a lot of people who can guess what this is. The next picture is a bit more obvious. I took it when I was messing around with the props for a Mocca-Chocolate Marbled Madeira Cake (I just named it, I'll post the recipe some time too!). Enjoy and till next time!

Showing off: Spiced Apple Cake

I've had a new camera for a while now and I’ve only made two posts with pictures I made with that camera. Of which one was made in such a hurry you don’t even notice the difference! So it’s time I showed off my new camera skills. Just, not today. However, I do want to show what kind of lovely pictures I made with my ‘old’ camera just before I got my big Nikon.
So this time I’m showing off pictures of a Spiced Apple Cake I posted before. I didn’t have any dates that time so I used raisins instead. Also, I didn’t have any walnuts so I scratched that as well. Really I only made the cake to get rid of the apples I didn’t like.
That was last summer. Can you imagine how far behind I am with posting? Just thinking about the amounts of work I have to catch up make me want to run away and hide.


Last summer I spent a lot of time getting into and reading up on food photography. One of the books I read was From Plate to Pixel from Hélène Dujardin. It was amazing how many things were in that book that could help me with my work. Unfortunately a lot of them needed photography equipment as well. Now, I don’t have diffusers, reflectors, studio lights, umbrellas, scrims and whatnot (don’t ask), but I did learn a few neat tricks. For example: making apples look fresh by spraying water on them. I think it makes them look so delicious! 


I messed around with the different props I picked out for my pictures. Some of the things I came up with aren't half bad, don't you think?
Apart from messing around with the materials when I was making the pictures, I also did a bit of editing afterwards with Photoshop. I'm starting to really like the options I have on there. I figured out now, that if I wanted I can turn the apples on the pictures from green to red. Isn't that amazing? With these pictures I only messed with things like contrast and vibrance, so for my blog I'm really going to stick to the easy things.


Lastely, I've been messing around on my blog as well. Did you notice these pictures are a lot bigger? Do you think it's a lot better like this? 
I hope you enjoyed the pictures! Don't forget to look at the recipe here.
 
Edit: I think I actually quite like how the pictures are now (slightly bigger size, centered) compared to before. I think I will stick to this!
Also: why is there so much space between the title and the text? Its like I put a few enters inbetween! Someone solve it!!

Saturday, November 17, 2012

Sister's 17th Birthday

Photobucket

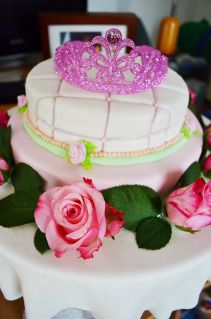
It’s been WAY over a month ago since I last posted something! It’s almost disgraceful. But rather than the usual bit of lazy I’ve actually been very busy. One of the first things I made after my last post of Pumpkin Soup was my sister’s 17th Birthday Cake (or is it 17th birthday birthday cake?). It was quite a challenge. So far I’ve always said I disliked making fondant cakes. Somehow I always felt they were very plain tasteless cakes with a far too sugary layer over it and way too many decorations to ever eat. Where was the actual food experience? Something to make your taste buds go wild? I took it back after making a good fondant cake myself. Well, admittedly the taste itself wasn’t spectacular. But making a fondant cake proved to be a lot of fun.

Photobucket

I can’t give you a recipe for this cake. As it is a vanilla madeira cake covered in buttercream icing with fondant over it. I have recipes of the buttercream icing here. I realized I haven’t posted any recipes of the madeira cake while I’ve made SO many in the meanwhile! I’ve had an entire phase of madeira cakes in all variations and I have so many lovely pictures, but appear to have been too busy to have posted any! The fondant I used was Satin Ice White Vanilla. The same one Cake Boss apparently uses. My sister had watched a few episodes of Cake Boss and really wanted a cake of her own.  I tried to make it more eccentric like they do in Cake Boss and wanted the cake to be able to turn -by motor- and have a melody play while doing so. I got quite far with the plans but the cake was simply too heavy for the little motors I could find so eventually I scratched that plan. 

Photobucket

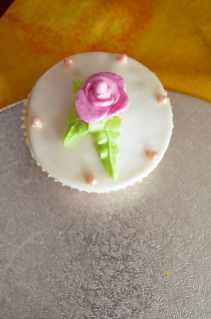
I did try to make the rest of the cake according to my sisters preferences and colours. I made the cake pearl with pink and a silver glittery shine all over. The shine is a bit hard to see on the pictures, but it’s there. I also went with roses, since she really wanted flowers on her cake. In the end her cake looked a lot different than all the cakes she’d shown me on pictures. She said she loved it though. And I did too. Just like my mom, I think the cupcakes turned out a lot better. It took me two entire days making it, including cupcakes. From 9 in the morning till around 8 at night. I've never spent so much time making a cake. It was absolutely tiring, but well worth the experience!

Photobucket

Actually, just because I can’t give you a recipe, doesn’t mean I can’t in any way help in case you want to make a cake like this yourself. There’s a few things I learned while making this cake:
- If you leave fondant out in the air it will DRY OUT until it is very very hard. And that process actually starts while you’re still kneading!
- Also, if you leave the cake, with fondant, in the fridge or leave the little fondant flower between wet paper towels to counteract the previous point, the fondant will actually melt. Your flowers will be little dots of colourful goo and your cake will need to dry for quite a while before you can actually work with it. 

Photobucket

- Although you need only a little bit of buttercream to make the fondant stick to the cake and prevent crumbling, it tastes SO much nicer when there’s a lot of delicious buttercream in between!
- Think high! The layers of my cake should have been higher. I should have used two cakes for each layer and stacked them very high. It’s not that it was bad, it would’ve just been so much better and impressive if it was taller than about 15 cm/6 inch high. Also, don’t make the bottom layer part of the cake stand. Has anyone noticed my cake has 3 layers?
- Especially when it’s your first time: just enjoy making it. Don’t think too big and be proud of yourself afterwards!

Photobucket

I hope you guys enjoyed the pictures and the ranting! Please look forward to new recipes soon! I’ve got some nice new stuff coming up! 

Tuesday, October 2, 2012

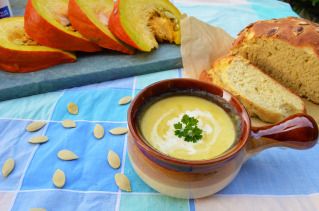
First pics of my new camera: Pumpkin soup

More than a month passed without me posting anything again. Will you believe me if I tell you school takes up a lot of time? But I’ve got a new recipe for you now!
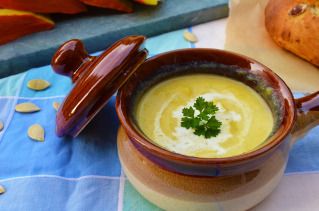
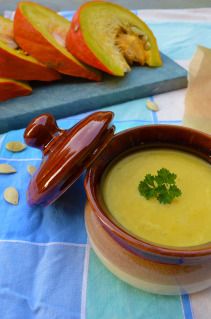
Actually, it’s not a new recipe. But it IS a new camera! I finally got myself a Nikon D5100 and experimented with it a few times as well and it’s just amazing. It makes better pictures than my small point and shoot, which is still the loveliest in the world. This pumpkin soup was one of the first recipes I made again after I got my camera, so I’m sharing some of the first pictures I made with my camera along with an update of my previous pumpkin soup according to my mother’s recipe.

 Photobucket  

Ingredients: 
Pumpkin flesh 
Broth (from cubes or powder) 
Water 

Optional: 
Leek 
Garlic 
Herbs like parsley, oregano or basil 
Bacon (shredded or chopped) 
Cream (sour, whipping, double) 
Salt & pepper

1. Oil a pan with a bit of olive oil, or anything else you have, and add all the pumpkin flesh you’ll be using. Put the pain over medium to low heat and leave it, depending on how much you have, about 20-30 minutes. Although it might be handy if you check the pan every once in a while in case the pumpkin starts burning, there is no actual need to stir or even check. If you are using leek, add these after 10-20 minutes and you’ll be fine.
2. You will notice the pumpkin flesh is very soft after cooking all this time. Use a mixer or immersion blender to mash the pumpkin (and leek) to pulp.
3. Add the broth in cubes or powder. Also, depending on your pumpkin and how you like your pumpkin soup, you might want to add water.
4. At this time you can also add any of the optional ingredients for the pumpkin soup like garlic, herbs or bacon. Leave on a low to medium heat for another 10 minutes. I suggest frying the bacon lightly beforehand if you’re using any, but it’s not necessary.
5. As soon as you turn the heat off and the soup stops boiling, you can add your sour, whipping, double or any other kind of cream (almost all of it works lovely) and stir.
6. Serve directly after. Or wait until it cools down to eat this soup cold.

The soup you see on the pictures is made with garlic and cream. A week later I made the same soup and added oregano and a bit more broth and salt, as the previous was very sweet. My mom made another pumpkin soup after – we had a lot of pumpkin – and added garlic, bacon and oregano. Personally I think the bacon overwhelms the taste of the pumpkin, making the soup a nicer and edible version of the famous dutch ‘erwtensoep’ (pea soup).

Photobucket

Since we have so much pumpkin, and still do, I also decided to make some bread, which I will post later on along with roasted pumpkin slices with maple syrup. Perhaps I can also try a pumpkin cake. Maybe jams? Are there any suggestions on what to do with a lot of pumpkin?

 Photobucket

Monday, August 27, 2012

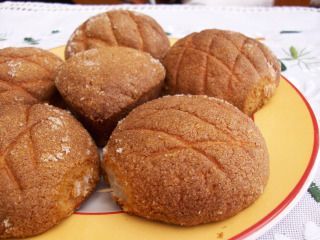
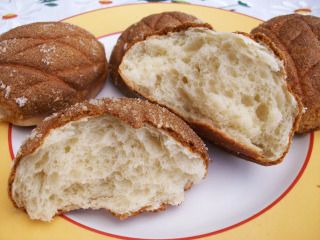
Melon pan

I’ve made these lovely little buns a few times before (like here and here), but I decided it was time to try a new recipe. Especially because I found a recipe video of melon pan on youtube. Someone made a youtube channel entirely dedicated to food and recipes. It was amazing. A whole new world opened up to me. Did you know there are so many people on youtube with whole channels dedicated to food? It’s amazing! I never knew! It makes me want to give it a try as well, but I already know I wouldn’t very much like seeing my face on the internet or hearing my voice nor my talent for filming or my editing with windows movie maker. No, the whole thing is just a terrible idea. I’ll just stick to watching other people.

Photobucket

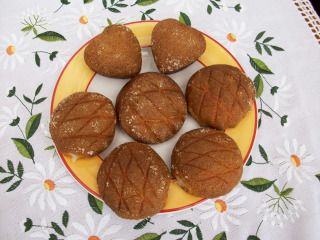
Back to the lovely bun. I finally know why it’s called melon pan. I’ve always thought it was called melon pan due to the taste. (I still wish it was.) I was totally wrong. The buns are called melon pan because of shape, which is supposed to resemble a melon. I’ve seen this being called pineapple bun, which I believe would be more accurate. I wonder how it would taste with a hint of pineapple. Oh, I wonder about all the different tastes I could put in it. So far I’ve tried banana, chocolate, vanilla –of course- and mocha. I’ve also finally made my turtle melon pan’s! Next time the shells need to be green. What taste can I try that goes with green? Green tea? Pandan? Oh, the possibilities are endless!

Ingredients for the bread dough:
140g bread flour
2 tablespoons sugar
1/2 teaspoon salt
3 teaspoons milk powder
1 teaspoon instant yeast
1 tablespoon beaten egg (about 1 small egg)
70ml lukewarm water
15g butter

Ingredients for the cookie topping:
25g butter
35g sugar
25g beaten egg
80g flour
1/4 teaspoon baking powder


1. Start with making the bread dough: sift the flour into a bowl.
2. Add the sugar, salt, milk powder and instant yeast and mix it with a whisk.
3. Beat the egg and the water together and pour it into the bowl. Mix it in with a fork and then knead until you have a slightly sticky dough. Add more flour if needed.
4. Place the butter in the dough and knead until it is fully incorporated. Then leave the dough to rise (in a greased bowl with plastic wrap or towel over it) for about 40 minutes or until doubled in size.
5. Knead the dough to remove the trapped gas and roll it into a cylinder. Cut the dough into 6 or 12 equal pieces. (Or any other amount depending on the size you want.)
6. Roll the pieces into balls and put them on an oven tray (greased or lined with greaseproof paper). Let them rise for another 20 minutes.
7. Now comes the tricky part: we’ll cover the dough-balls in cookie dough. You can see a picture of it on an older post of mine on melon pan here or watch this youtube video for a good explanation. Start with putting sugar in a bowl and cutting two pieces of plastic wrap.
8. Take a bit of cookie dough and shape it into a ball. Place it on a piece of plastic wrap and cover it with another piece of plastic wrap, then flatten it into a large circle with your hands or a flat object. The plastic wrap will prevent the dough from sticking to everything. Then take one of dough-balls we shaped before and roll it again. Take the flat cookie dough and place it on your dough-ball, wrap it around the ball, leaving only the bottom open. ‘Pinch’ the bottom with your fingers and hold the dough-ball in one hand like that, and roll it into sugar. Then place it bake on to the baking sheet.
9. Repeat step 8 to cover all the dough-balls in cookie dough and sugar. Take a knife and make 2-3 diagonal cuts on the bun and another 2-3 crossing those (think melon/pineapple!). Leave them to rise again for another 40 minutes.
10. Preheat the oven to 170 degrees Celsius or 340 degrees Fahrenheit. Leave the buns in the oven for 12-15 minutes and voilà!

Photobucket

These are without a doubt the most fluffy little buns I’ve ever tasted. I’ve made them so many times now I can’t even remember. Did you follow step 7 and 8? I honestly didn’t know how to put it down in words so someone would understand. When you don't understand, just watch the video. It's very easy to do, just hard and long to explain. Don't let this hold you back from making them because you're seriously missing out if you haven't tasted them before!
If you’re wondering which of the recipes to go with, I can tell you they’re not that much different. I realized the cake topping is practically the same. The recipe for the sweet bun is also very much alike. However I did get more success with this recipe rather than the previous ones. Whether that is due to practice, the flour I used, the way I baked them or the minor changes in the recipe, I wouldn’t actually know.

A note on the turtle melon pans: if you want to make your own, make the bun first and cover it in cookie dough. Then add little balls for the feet and head later. It comes out prettier that way. I didn't add any pictures of these totally cute buns, mainly because they came out completely horrible on the picture. The day I made these was the second day in a row that I was "forced" to make melon pan and the whole family attacked the food as soon as it was out of the oven. I barely had any time to save my life let alone my buns to take a picture.

Photobucket

Thursday, August 16, 2012

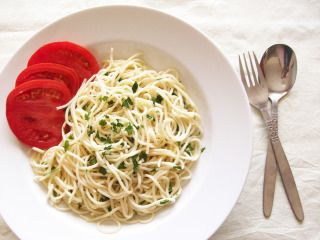
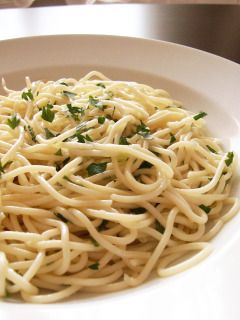
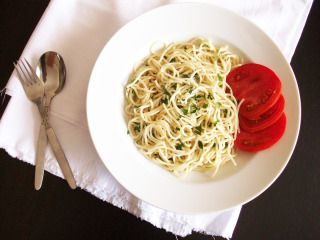
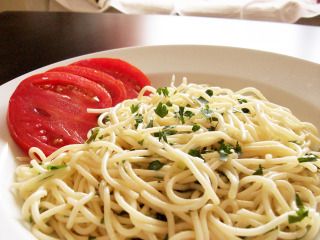
Aglio et olio

I’m all exited about blogging again. I’ve speed-posted five recipes in two days! If only I had sat down to do this before. I’m also still very excited about my camera and all the things I can do with it. I spend about 10 minutes making this recipe and at least another 20 trying to make a good picture. Just looking at them makes me feel like I’m not even close to a perfect picture and I can’t wait until I make something truly wonderful. Not just the taste, but also the looks of it and then also the way I put it on my camera. One day it’ll be amazing! Maybe it'll be after I buy a new (bigger, better and more expensive) camera and get myself some photography gear (I want, I want!). But you just watch! I will do it!

Photobucket

Okay, now I’ll stop ranting on about my dreams of food photography and styling and share a very easy recipe. It’s perfect for any leftover spaghetti you have that you didn’t throw into any sauce yet.

Ingredients:
Spaghetti (leftovers or cooked and cooled)
Olive oil
Garlic or spring onions
Parsley or basil
Salt & pepper to taste


1. Pour the olive oil over the spaghetti until it’s ‘wet’ all over. It all depends on the amount of spaghetti you’re choosing but you’ll probably end up with a spoon or three. Just add one and mix and add more until you’re satisfied. Remember it’s easier to add than to take out!
2. Cut your garlic or spring onions – not both, it’ll be too strong – and mix them into the spaghetti as well.
3. Chop up your basil or parsley and throw those into the spaghetti as well.
4. Lastly add the salt and pepper to taste. My taste requires quite a few pinches of salt and no pepper at all, but you’re probably off best adding what you’d normally add to a dish.
5. Serve cold with tomatoes (cherry tomatoes, mmm) or a salad. This is a very plain main dish so make sure you eat enough vegetables on the side!

Photobucket

And there you have it. I couldn’t really choose an easier recipe to make today. I didn’t put all the spaghetti I had on the plate and I was quite happy I could eat those leftovers of the leftovers while taking pictures. And after that, I ate it all. With some help.
A little note on the recipe: use good, high quality, olive oil. You can buy an olive oil, with a taste like pepper, lemon or basil and you might even get away with a completely different oil like walnut oil (although I wouldn't think so). However, don't use any oil you don't like the taste of naturally. Some cheap chemical-tasting olive oils will do fine for cooking, but the taste will be too prominent in this dish and in the worst case will make it taste horrible. I also really wouldn't recommend sunflower oil, but if you're desperate I suppose it might be worth a shot. Just be sure to use as less as possible when you don't like the taste or you're unsure.

Photobucket

Maybe you noticed but I posted this recipe before, with not so many words. But I felt obliged to post it again, especially after all the inspiration I got which has no where to go.

Photobucket

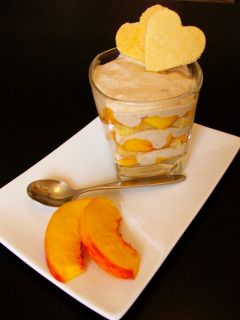
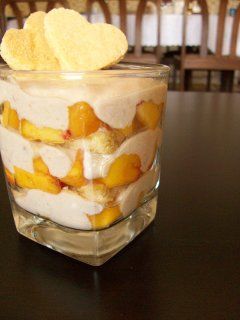
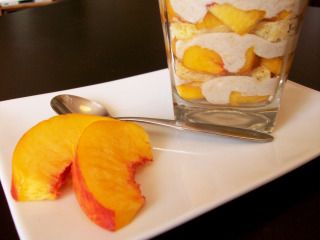
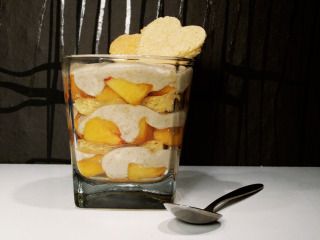
Eierkoeken – Dutch “eggcakes” – with Peach Trifle

Eggcakes would be the very literal translation. If I ever come across a better word for it, you’ll be the first to know. I do know that there isn’t really anything like it in English. Having that said, even this recipe is nothing like the thing you’ll find in Dutch supermarkets. The ones you find in supermarkets are super big, fluffy and don’t dry out easily. This recipe, when baked slightly too long or when not eaten the same day will dry out into biscuits. Mind you, they won’t be bad biscuits. They’re actually very tasty, but they won’t be what we originally had in mind when baking.

Photobucket

I really wanted to make a trifle so I decided I needed these for in between the peach and cream. I have made a Peach Trifle before, in which I used eierkoeken from the supermarket. This time the trifle I made turned out completely different.


Photobucket

Ingredients:
3 eggs
150 grams sugar
1 bag vanilla sugar (7 grams)
150 grams self-raising flour
30 grams maïzena


1. Separate the eggs and whisk the egg whites until fluffy.
2. Add both sugars to the egg yolks and whisk until the mixture becomes creamy.
3. Add both egg mixtures and mix again.
4. Sift the self-raising flour and maïzena over the egg-batter and mix again.
5. Preheat the oven to 150 degrees Celsius or 300 degrees Fahrenheit. Line an oven tray with greaseproof paper and spoon the batter onto the tray in circles the size of your fist (but then flat, actually, just think of the palm of your hand).
6. Leave the “cookies” in the oven for about 20 minutes until the edges become brown and the middle is fluffy.

Don’t worry if the eierkoeken don’t turn out soft and fluffy. I’ve tried different recipes for these cakes and they all have the same flaw.
So then I made the trifle, which was really nothing more than layering the cookies we just made with slices of fresh peach and a home-made cream. Home-made cream sounds nice doesn’t it? It really wasn’t more than mashed bananas with a bit of peach puree I had left from making peach lemonade. I also added a bit of Philadelphia cream cheese. I think I stopped there, but I felt like proper scientist making this cream (a little bit of this, and a little bit of that, oh! Some more of this one too..). And then it was time to stack. I tried to do it really nicely as these pictures were the first in which I tested my camera settings and several lighting options. Say, they didn’t turn out too bad right?

Photobucket

Maybe you noticed, but I also tried to photoshop two of the four pictures. Can you tell which ones? I really hope my peach doesn't look chemical now! There's really so much for me to learn.

Photobucket

Cheese cake

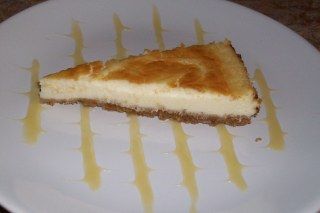
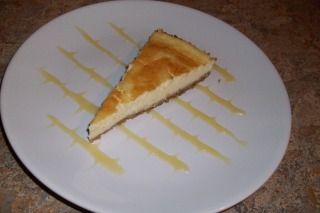
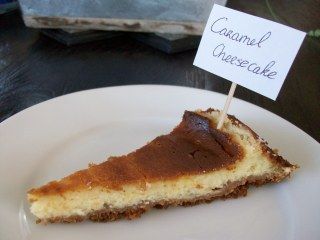
I’ve made this cheese cake two times already now. The first one was a great success. The second one was less so, since the sides caramelized and the cake completely collapsed. I renamed the second version Caramel Cheese cake and all was well again. I made the Caramel Cheesecake for my birthday for the family and I got a lot of compliments about it, even though I thought it was kind of a failure myself…
That’s how the post would’ve started had I actually posted it around three months ago. It’s the proof that I have been doing some things and saved them on my computer. The reason I’m posting it now is because I made another cheesecake just the other day. I never had time to take pictures of that one. It was gone in less than 24 hours! And I only ate one piece.

Photobucket

Ingredients for the cookie base:
850 grams digestive cookies
6 tablespoons butter
2 tablespoons sugar

Ingredients for the cheesecake:
1 1/2 cups granulated sugar
900 grams cream cheese
1 teaspoon vanilla extract
4 large eggs


1. Crush the cookies with a mixer or the back of a glass. Melt the butter and mix it, with the sugar, through the cookies. Press the mixture onto the bottom of a greased or lined cake tin and leave in the fridge.
2. Beat the cream cheese until smooth. This could take a minute or 3-4.
3. Gradually add the sugar and beat until it is completely mixed in.
4. Now add the vanilla and mix again.
5. Add the eggs one by one, while making sure one is fully incorporated before adding the next. Mix them in on a the lowest speed of your mixer as to not over-beat the mixture.
6. Pour the cheesecake batter onto the cookie base and leave in a preheated oven of about 180 degrees Celsius or 350 degrees Fahrenheit for about an hour.
7. Eat the cheesecake with a lemon jam or other and enjoy!

I noticed in some of the cheesecake recipes they ask to put the cake tin in a bath of water in the oven and leave it that way. I have tried this once and it was a complete failure! Also, I’m pretty afraid of something going wrong with that much water in the oven. This means that I’m probably using the wrong settings for my oven, as I’m not using any water. However, the temperatures worked for me before so I have no intention of changing it a lot. What I’m trying to say is that the texture is slightly different of the cheesecakes of the original recipe and there is a chance it will fall apart and, like my cake, caramelize at the sides. Still, there is no way this won’t taste good.

Photobucket

I’ve been trying to update my blog more lately and I’m also trying to push some changes through. See the row of pictures at the side? Or did you notice how my pretty recipe index at the other side, which took an awful lot of work, has turned into a simple drop-down menu? By the time I actually post this – mind you, I’m still typing this in Word – perhaps my banner will have changed as well. Changing the looks of my blog is always an exciting process, but it makes me feel bad too. All the time I spend in recipe indexes, blog banners and little adjustments here and there is all gone, because I’m erasing them and starting anew. I do like the way my blog is evolving though. I feel sometimes it’s starting to look more professional or at the very least less like the work of a 5-year-old who’s been messing with her computer. It feels like growing. Wonderful!

Photobucket

Wednesday, August 15, 2012

Marbled pound cake

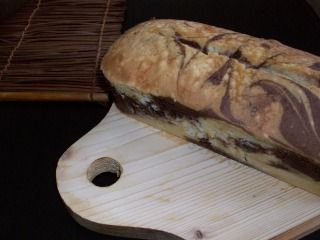
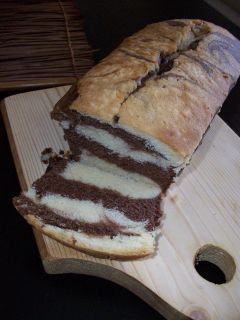
There are people out there who have never eaten banana bread, peanut butter or even marbled cake. So spread the word. Or rather the cake in this case, because I’ll be showing you a recipe for marbled pound cake. Since I’m still not anywhere near my home I’ve had to browse the internet for a recipe. I’ve found one for a marbled pound cake. What the difference between normal cakes and pound cakes is I would for the life of me not know. I do know that this recipe works and it gave a very nice consistency to my cake. Plus the recipe is easy enough to make all over again and requires ingredients I have at home already anyway.
I also know that the pictures still don’t do any justice to the taste of the cake, or even the looks at that. I so wish I had a better camera and, most of all, more skills to convey the plain wonderfulness of the things I bake. Waiting for all of this takes so long!

Photobucket

Ingredients:
2 cups white sugar
1 cup butter, softened
4 eggs
3 cups cake flour
1 1/2 teaspoons baking powder
1 cup milk
2 teaspoons vanilla extract
1/4 teaspoon salt
1/4 cup (unsweetened) cocoa powder


1. Beat the sugar and butter until light and fluffy.
2. Beat the eggs in one by one while making sure to fully incorporate one before adding the next. Mix in the vanilla extract
3. Sift the flour with the baking powder and mix it through the batter.
4. Lastly add the milk and mix again.
5. Put about half of the batter in a separate bowl and add cocoa powder.
6. Grease or line a cake tin and put one spoon of vanilla batter on one side of the tin and one on the other, put a spoon of cocoa batter in the middle. For the next layer put the chocolate batter on the sides and add a spoon of vanilla batter in the middle. Keep layering the cake like that until you’ve used all the batter.
7. With a skewer, fork or spoon cut and twist through the batter to give it a swirly, marbled effect.
8. Preheat the oven to 175 degrees Celsius or 350 degrees Fahrenheit and leave the cake in for about 40-45 minutes or until a skewer comes out clean.

Photobucket

Quite a lot of the comments on the original recipe stated that the cake was far too dry. I made some adjustments to prevent this, but this cake still tastes better with a glass of milk. Other than that you’ll love the taste. Somehow I found my cake to taste slightly different from the normal vanilla or chocolate cake, in a good way.
I had some left over peanut butter meringue frosting and that goes very well with this as well. I still have to post the recipe for this one, so I owe you one! Just don’t remind me of all the things I still owe you and all the things I have on my computer that haven’t been posted yet. Oh, I have so much to do!
Until I see you next time then – I promise it will be soon. Enjoy!

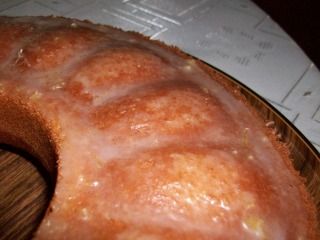
Banana Cake

It’s been raining banana’s here. Okay not really, but everyone seems to buy them and no one’s actually eating them. This is one of the first things I thought of to get rid of them. I’m no fan of plain banana’s, but I’d never say no to banana cake. I browsed the internet until I found something that would work for me. I found a Banana Cake that required melted butter. Having found a recipe that sounded good enough to me, I set straight to work.

Photobucket

Ingredients:
200 grams unsalted butter
175 grams caster sugar
100 + 150 grams plain flour
4 eggs
1 lemon
200g banana (about 2 bananas)
3 tablespoons baking powder
Powdered sugar and lemon juice for glazing


1. Start with mashing the banana and zesting the orange.
2. Melt the butter and mix it with the sugar until smooth. Add 100 grams flour and mix again.
3. Beat the eggs lightly and add them to the mixture in 4-5 additions, beating well in between.
4. Lastly mix in the lemon zest, 2 tablespoons lemon juice and the mashed banana.
5. Sift 150 grams flour with the baking powder over the batter and use your mixer one last time.
6. Line or grease a cake tin and pour the mixture into the tin. Preheat the oven to 160 degrees Celsius or 320 degrees Fahrenheit.
7. Leave the cake in the oven for about 35-45 minutes or until a skewer comes out clean.
8. For the glazing, add lemon juice with enough powdered sugar to make a thick, but still liquid consistency. Spread over the top of the cake with a brush.

The cake came out so beautifully moist! I was quite surprised this came out so wonderful. I can’t even begin to describe how horrible the oven is I’m using so anything that comes out the way I want it is a miracle.
I’m going to have to admit again that I could’ve spend more time on taking pictures. Or on the glazing I put on it at that. I just couldn’t help but want to eat it. I wish I could tell you how it smelled or made it look better to make you drool all over the place. But you’re going to have to do with this. And take my word for it. You want this.

Photobucket

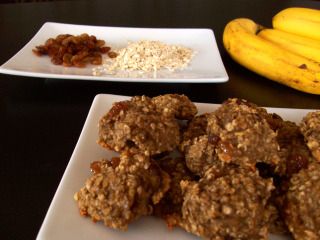
Banana Oat Cookies (2 ingredient cookies)

I haven’t posted anything in ages! I’m so SO sorry. But I’ve got a good excuse! I’ve been abducted by aliens who got stuck in traffic mainly because the bridge was open and they forgot time and all they really wanted to do was keep me from posting. Good news is they weren’t after my brains so I survived all of this. No. Actually I have vacation and I’ve been too busy and too lazy. I’ve been baking a lot and wrote down a lot of recipes, but I simply haven’t posted them. I have some actual Good News though. I’ve been trying to hone my photography skills so my pictures should start to look better from now on.


So now for some actual baking. I found this recipe when I was searching the web for some DIY things to do. The writer was totally enthusiastic about the two ingredient cookies. For the most basic cookie I can think of you need at least butter, sugar and flour, so cookies with just two ingredients sounds amazing! I’m not sure what made me make these cookies as banana’s are definitely one of my least favourite fruits and I was never a fan of oats either. The idea of adding raisins was nice though. But I think what made me make these cookies was the writers enthusiasm about her 2 ingredient cookies and my curiosity on actual two ingredient cookies. So I made it. And ate them all. I didn’t actually share them either. I’m horrible, I know!

Photobucket

Ingredients:
2 bananas
1/2 cup oats
1/4 cup extra’s (like raisins or chocolate chips)


1. Mash the bananas in a bowl with a fork until you’ve got rid of the biggest lumps. I like a few banana chunks in there, but feel free to mash it all the way.
2. Add the oats and whatever else you’re adding (or not) and mix away.
3. Dump the ‘batter’ in cookie-sized bites on an oven plate (either greased or lined with greaseproof paper!!) and dump into a preferably preheated oven of 180 degrees Celsius or 350 degrees Fahrenheit for 10-15 minutes.
See? It’s totally easy right? This is the easiest 100% no-fail recipe I’ve ever seen and I actually like it. It’s totally healthy too! I’ve made it quite a few times since the first time and added chocolate instead of raisins as well. I’m going to have to agree they don’t look the most appetizing, but I’m sure you’ll be surprised!
Enjoy! And have a nice vacation to those of you who have also gotten lost in the space-time continuum!

Sunday, July 1, 2012

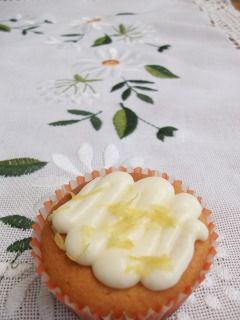
Lemon cupcakes

I quickly made these for my family birthday party. I still had some extra lemons from the Lemon Sorbet I made that same day and decide lemon cupcakes would be a brilliant idea! So I looked up all the ingredients and ended up with this recipe. I’m kind of disappointed about the fact that the recipe doesn’t call for lemon juice as I’d like to add that alongside the zest, but I didn’t have the time for researching recipe that call for juice and wasn’t sure if you can substitute milk for juice in recipes for normal cupcakes. Anyway, these weren’t all that bad in the end and they did taste like lemon!

Photobucket

Ingredients:
125 grams butter
125 grams soft sugar
2 eggs
100 grams yogurt
125 grams self-rising flour
Zest of 2 lemons


1. Beat the butter until soft. Then add the sugar and beat again until fluffy. Lastly add the lemon zest.
2. Sift the self-rising flour through the batter in 3-5 additions.
3. Beat the eggs lightly and mix them with the yogurt.
4. Add the yogurt mixture to the butter mixture and beat everything together.
5. Spoon the batter into cupcake cups and leave them in a preheated oven of 170 degrees Celsius or 340 degrees Fahrenheit for about 20 minutes.

Photobucket

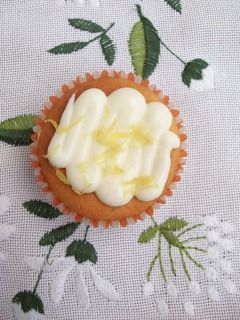
These cupcakes came out completely flat on top. Which makes them perfect for decorating! Unfortunately I didn’t have the most spectacular topping, but I think this sort of simplicity made them look quite elegant still. I can’t remember what exactly I made for the topping. I know there’s lemon zest on it and I believe the topping is cream cheese with lemon juice and powdered sugar to get the right consistency and taste, but I’m not 100% sure anymore.

Cool me down with Summer Ice Cream

Nothing is better for cooling down in summer than ice cream. And no ice cream is better than lemon sorbet. During the hot days this ice cream will definitely cool you down and make you feel better. The slightly tangy taste of yogurt makes the yogurt ice cream very refreshing as well. So here I present to you two perfect summer ice creams!

Photobucket

I served them to my family on my birthday party and I got compliments from everyone. Somehow I always do when I bake for family, but not always from EVERYone and I don’t get asked where I got the ice cream machine, how it works and if my uncle should buy it too, because he’s seriously thinking about it. I’ve looked ice cream machines up, and they’re about 40 euros max., so if you eat a lot of ice cream and would definitely prefer home-made ice cream (who wouldn’t?) AND you have space in your house, then I definitely wouldn’t hesitate.
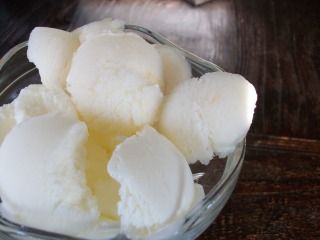
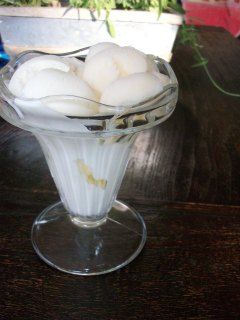
The only thing I hated about this recipe was making pictures. I don’t have an ice cream scoop so I couldn’t make perfectly shaped balls. Then I put them in a bowl and realized they were melting. MELTING! How can someone make nice pictures when they’ve got only a minute or two to make them?

Lemon Sorbet Ice Cream

It’s like lemonade only then the ice cold edible version. It has real zest in it, but feel free to leave that out. You could also leave out the sugar for a sugar-free version (use 450 ml water instead), but it could get very tangy then. I don’t really know what to say about this ice cream. It’s lovely. It’s Lemon Sorbet.
Do keep in mind that this ice cream is made using an ice cream maker. If you don’t have the machine to do it you’d get a different texture for sure. You can still use the same recipe, but I’d advice to leave out the egg white. You’d have to leave it in the freezer and come back every 15-30 minutes to mix it a bit like granita. I haven’t tried this, but it could work. Also, you can just as easily use this recipe to make ice cream Popsicles. You wouldn’t have to mix it every half hour. I’d still leave out the egg white, since this floats on top originally and gets incorporated through the mixing process.

Photobucket

Ingredients:
Juice of 1/2 an orange
250 ml lemon juice (4-5 lemons)
Zest of 1 lemon
250 ml water
275 grams sugar
1 egg white


1. Put the water and sugar in a pan and dissolve the sugar on medium heat. Bring to boil and leave for about one minute and then leave to cool.
2. Juice the orange and the lemons and mix them together with the cooled syrup.
3. Beat the egg white till it becomes fluffy but do NOT let it become stiff.
4. Whisk all the ingredients together and leave in an ice cream maker for about 30 minutes.
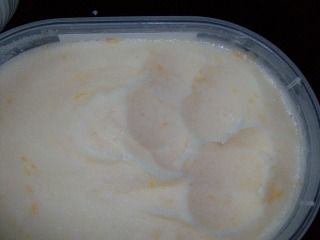
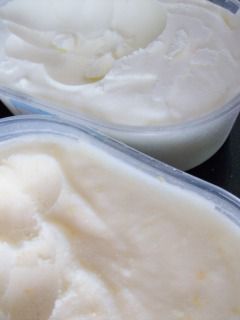
5. Put the ice cream into a box and leave in the freezer for an additional hour or so, especially on hot summer days.

Photobucket

Yoghurt Ice Cream

Yogurt Ice cream gives a perfectly white colour, which actually surprised me when I looked at it. Then again, it’s not surprising yogurt ice cream ends up white. It’s slighly tangy from the yogurt, but just enough sweet to not be annoying. A lot of people thought this was vanilla ice cream, but I don’t taste the vanilla at all. I guess that just means everyone likes it.
Keep in mind that this recipe is also made with an ice cream maker. If you don’t have the machine the texture would be completely different. I imagine you’d have to put it in the freezer and come back every half hour to fifteen minutes or so to mix it. I’m not sure if this works and haven’t tried it!

Ingredients:
350 grams thick (Greek) yogurt
200 ml milk
125 grams sugar
150 ml whipping cream
15 grams vanilla sugar


1. Beat the whipping cream with the sugars together until it gets thick. Do NOT let it become stiff. A thick runny texture will do.
2. Mix the yogurt with the milk.
3. Beat the whipping cream mixture while you pour in the yogurt mixture, or mix them in several additions.
4. Pour into an ice cream maker and leave for about 30 minutes.
5. Put the ice cream into a box and leave in the freezer for an additional hour or so, especially on hot summer days.

And tadaa! You've just made two delicious ice creams! Scoop them into balls and put them on a cone, or serve them in a bowl. Serve them with hot chocolate or strawberry sauce or add a little cookie. I don't mind how you eat it, I assure you'll love it any way! Enjoy!

Photobucket

It's melting! - try making pictures of ice cream. It's simply not done.