Sunday, May 23, 2010

Chocolate chip marshmallow cake

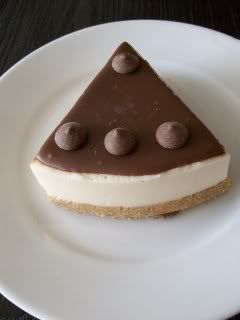
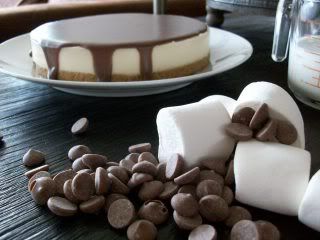
I've posted a recipe with marshmallows before, but when I read it again, I really had to admit it was all quite vague (hey! give me some credit for one of the first posts/recipes I've ever made!). So I wanted to try it again. This time I changed the recipe a bit, and used chocolate chips in it and added chocolate ganache on the top. It was very creamy and chocolaty! Personally I thought it was too sweet, but I might be biased since I LOVE the fresh fruits with it like in my first recipe. As long as others still like it, it's still great, and they did!
I put a bit too much gelatine in it, I believe, because the cake was rubber-thick. That didn't so much affect the taste, it's just nicer when it's a bit mushy!
I know I keep forgetting for what size these recipes are. This one is good for a 18 cm one or about 7 inches. If you want to make a jellylayer on top, I'd suggest a 20 cm or 8 inch one, since the jelly-layer will make the cake a lot higher and it won't fit in an 18cm/8inch tin.
Photobucket

Ingredients:
Cookielayer:
24 simple biscuits
1 spoon of sugar
50 grams butter

Marshmallowlayer:
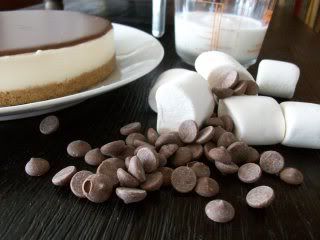
100-150 gram marshmallows
75 ml milk
150 ml whipping cream
4 gelatine leaves


Cookielayer:
1. Crush the biscuits any way you like! You can try it by hand, with the back of a glass, but I'd suggest a mixer here.
2. When you're sure there arent any big crumbs left, add the sugar and mix again.
3. Melt the butter in a pan or microwave and mix that in too. You might need more if the cookiemix isn't sticky enough. It should stick together, but not to your fingers!
4. Butter or line your caketin and push the cookiemix to the bottom.

Marshmallowlayer:
1. Put the marshmallows and the milk in a microwaveable bowl and put it in the microwave. Take it out a few times to stir and wait till everything is melted. You can also double-boil this, but it takes a lot longer!
2. Put the whipping cream and gelatine leaves (you might have to soak them first) in a large pan and wait till the gelatine has dissolved.
3. Add the melted marshmallows and stir it well. *
4. When everything is nicely mixed in, poor the mixture over the cookielayer and let it set in the fridge for about an hour.

* For the chocolate chip version:
3 1/2. You're going to need about two hands full of chocolate chips that you can sprinkle over the marshmallowlayer and might have to press down a bit.

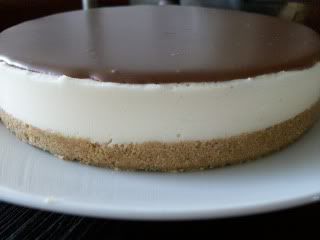
5. Poor chocolate ganache over an already set cake and leave it to harden a little bit longer. And voilá! A sweet chocolaty and marshmallow cake! All for you! (well, you might have to share)
Photobucket

I could make some "Tips/suggestions for this recipe" like I have been doing the last few recipes. I actually like doing that (but should I?), gives me the chance to rant about all the other things possible with a single recipe!! Or anything you'd have to watch out for. But really, for this recipe I can only think of things like, dont use too much gelatine or it'll become rubbery like mine, and: ADD THE FRUIT! I can't help but love the fruity jelly layer on top of the sweet mushy marshmallowlayer!
Photobucket

Photobucket

Sunday, May 2, 2010

A Happy Easter!

I know, I know! It's been a while since easter. Yet, I've made some things that would really fit the theme and I couldn't help but show! Maybe for next year these will inspire you!

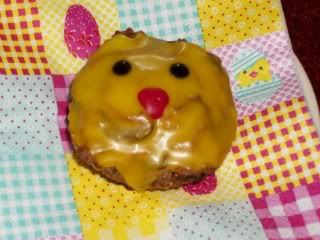
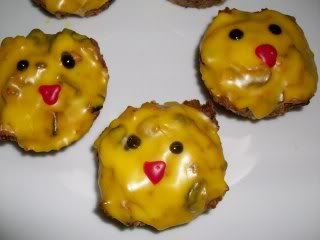
To start off with: the Easter Chickies! I admit they would've been loads cuter had I use cupcakes rather than a very rich fruitcake! A basic recipe for cakes can be found here and here! If the top is uneven, like in my case, it's wisest just to cut the top off with a sharp skewed knife and then poor the icing on top. The glacé icing, is really the easiest icing ever to make! Here goes!

Ingrediënts for Glacé Icing:
powdered sugar (the same as the amount of icing you want)
vanilla essence or any other flood flavouring or juice
food colouring (if wanted)
water (if needed)


Photobucket

Admitted it looks like a very vague discription. Just put the powdered sugar in a bowl. The amount of sugar is equivalent to the amount of glacé icing you'll get. Then add essences, juice, colouring and/or water and mix until you have a thick and sticky consistency just the way you like it! The glacé icing will harden when you leave it to dry for a while!
What do you think of my cute napkins? Easterstyle!

Photobucket

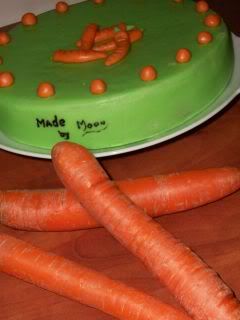
And what do you think of my semi-easter cake? I didn't have enough -home made!!- fondant left for a bunny! I'll post the recipe of these delicious Carrot cake later, together with a recipe for the fondant!

Photobucket

Sunday, April 25, 2010

Chocolate mousse bombes

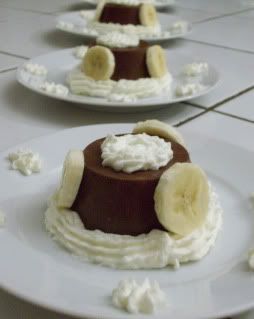
These little cute deserts were made after an idea of chocolate bombes. I thought it was an awesome idea and when you have an idea, you have to try it out!
For the original idea you can look here: link
I tried this recipe though, and it did NOT work out! The first problem was getting the chocolate out of the shapes. Using a knife broke them, fingers made them melt; I even tried greasing but that gives an awkward effect and didnt work either! I have no idea how they made that part work.
Other than that, I thought ganache was going to make it a bit too rich and used a mousse that I had tried out before and turned out real delicious then. (though admitted the rest failed back then and the cake look crap!)
Anyway, let’s get to this recipe!

Photobucket

Ingredients chocolate cups:
about 500 grams chocolate
(use any you prefer or you think will fit your decoration or taste best)


1. Double-boil the chocolate untill everything is melted.
2. Use a brush to brush the inside of a SILICONE cupcaketray or so. You can try a non-silicone one. But be prepared to loose some chocolate! Anyway, make sure to coat them thoroughly, maybe even do a second layer and leave them to cool for about an hour.

Ingredients mousse:
4 sheets or 2 teaspoons gelatine
400 grams chocolate
4 large eggs
300 ml double cream


1. Start with soaking the gelatine in 2 tablespoons water, or when using sheets make sure they ‘drown’ in the water.
2. Leave the gelatine for a while and start double-boiling the chocolate. Put it to the side and leave it to cool a little.
3. Seperate the eggs and beat the egg yolks into the chocolate mixture. You might want to beat them a little before pooring them in and then mix well.
4. In a seperate bowl whisk the egg whites until they form soft and fluffy peaks.
5. Add the gelatine to the chocolate and mix it in. Make sure to drain out the water when you’re using gelatine sheets.
6. At last, start with adding one spoon of the whisked eggwhites to the chocolate and mix. Then add the rest in a few additions.
7. Poor it into the chocolate cups you made before and leave it to chill over night. If you want to eat it that same day, you still need a few hours. I cant tell how much.
8. When chilled and done, flip them over and out of the silicone onto plates and decorate them!

Photobucket

Tips/suggestions for this recipe:
- use fruit in it! Bleuberries through the mousse made it a lot fresher and it was delicious!
- If you don’t like a hard chocolate cover, why not poor the mousse into pretty desert glasses and add an umbrella to it and some nice decoration. Your guests will be having delicious mousse-in-glass deserts! I can see this idea being served in restaurants!
- The original idea for the moussa was to put it between a chocolate cake. So go ahead, make a chocolate cake, cut it in half, poor the mousse over, leave it to chill for 30 minutes, put the other half on top, chill it a bit more and voilá mousse cake! Works best when you use milk chocolate cake and white chocolate mousse. For the effect you know?

Photobucket

Dont you think the little the deserts look cute? I think they’re so cute! They look kinda steampunkish. I can’t help it! Little cog-like thinggies! Next time I wont do the chocolate cover anymore though. I really didn’t like having to poke through this hard cover of chocolate. It tasted great, but I want it a bit more edible! I don’t want to have a war with my food before it’s edible!

I should be posting more of my "older" recipes soon. I've been far and faaarr behind with posting, but Ive got a new package with ingredients so Im going to have even more to write about! This time it's going to be making my own fondant, and decorate cakes with it! Something I got interested in quite a lot some time ago. I've got two of the most awesome books about it as well! I'll make sure to post more soon!

Filled puff pastries

Here’s an ovenproof recipe I made for a friend of mine. It’s really easy so even he cant go wrong on this! I tried to explain every single detail I could think of in the recipe. Which is also the exact reason why the recipe is so long, for something so simple!
Apart from the fact that this recipe is very easy, you can also variate in so many ways. You can replace the meat with anything vegetarian if you’d like. You can add cheese inside or on top, any kind of vegetables: mushrooms would be really nice. You can vary the cream in many ways, though it’s not advisable to take something with a sweeter taste.
I think these pastries are a kind of sidedish, or for lunch or as snack. But if it’s summer and you feel like having a light meal. Here ya go!

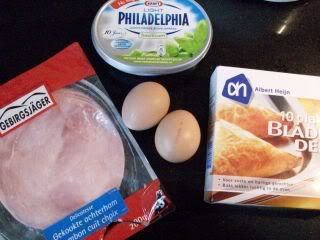
Ingredients:
about 150 gram cream cheese (I choose Philadelphia Basilicum Light)
1 egg
few slices ham (or bacon, or anything else really)
Puff pastry


Photobucket

1. Start with seperating the egg yellow from the egg white. You do this by cracking it and opening it the right way up. So the egg yolk will float in one half of the eggshell. Now you poor it over into the other, loosing more egg white on the way. Do this until barely any egg white is left. It’s okay if there is some egg white left. The idea is to get at least most of it out.
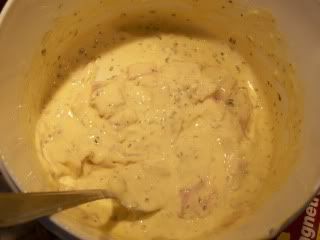
2. Mix the egg yolk with the cream cheese and add the ham, after you sliced this in little pieces.

Photobucket
(hurray for bad lighting! I still need to work on some pics!)

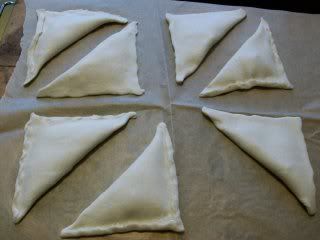
3. Take little squares of the puff pastry, or cut them first, and fill the middle with the mixture you just made. You can shape it into a triangle on one side, but make sure to stay about 1 cm away from each side. Then fold it and press the sides together.
4. At this point you can brush some egg whtie over the puff pastry, so you’ll get a shiney and crispy effect later on.
5. Repeat the steps 3-4 untill you have the amount of filled puff pastry you want! Put the pastries on greaseproof paper in the oven tray or at least make sure to butter the tray very well. Otherwise the pastries will stick to your tray and it’ll be real hard to get off and to clean!

Photobucket

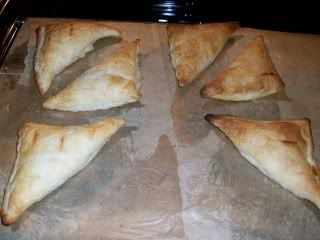
5. Preheat the oven to 180 degrees Celsius or 350 degrees Fahrenheit. When the oven is preheated insert the oven tray and leave it for about 20 minutes. Make sure to keep checking every once in a while and stop the oven when the pastries are golden brown, or start burning. That’s when they’re right or too right!
6. Be careful when you take them out of the oven. Don’t burn yourself and such! If it’s for a party you can serve them on seperate plates. Or if you’re making them for yourself, dump them all on one plate and start eating when they’re cool enough to eat!

Photobucket

Some tips/suggestion for this recipe:
- Poor a bit of lemonjuice in the mixture to add some extra taste!
- Precook any vegetables that take more than some short baking! Make sure to let any oil, water or butter leak from them, before you add them to the mixture. It’ll make the mixture run more.
- The thickness of the mixture doesn't matter that much. Thicker mixture are maybe easier to work with. Make sure the mixture is not too runny though, it'll make more of a mess really!
- You can sprinkle some grated cheese, sesame seeds, basilicum or any other herbs, seeds or spices over the top.
- You can vary the pastries in sizes, and even make little balls with an opening at the top. This would make a very cute and delicious party snack!
- If it doesnt work the first time, or you dont like the taste, don’t give up just yet! There are so many variations to it, there is bound to be something you like.
If there are any problems, just tell me and I’ll help! I hope you enjoy trying this recipe out!