Apart from the fact that this recipe is very easy, you can also variate in so many ways. You can replace the meat with anything vegetarian if you’d like. You can add cheese inside or on top, any kind of vegetables: mushrooms would be really nice. You can vary the cream in many ways, though it’s not advisable to take something with a sweeter taste.
I think these pastries are a kind of sidedish, or for lunch or as snack. But if it’s summer and you feel like having a light meal. Here ya go!
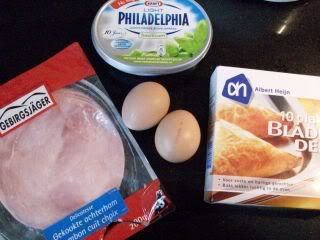
Ingredients:
about 150 gram cream cheese (I choose Philadelphia Basilicum Light)
1 egg
few slices ham (or bacon, or anything else really)
Puff pastry

1. Start with seperating the egg yellow from the egg white. You do this by cracking it and opening it the right way up. So the egg yolk will float in one half of the eggshell. Now you poor it over into the other, loosing more egg white on the way. Do this until barely any egg white is left. It’s okay if there is some egg white left. The idea is to get at least most of it out.
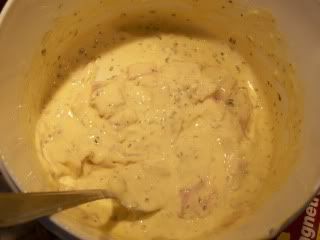
2. Mix the egg yolk with the cream cheese and add the ham, after you sliced this in little pieces.

(hurray for bad lighting! I still need to work on some pics!)
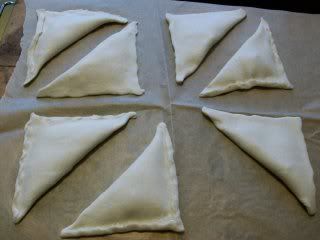
3. Take little squares of the puff pastry, or cut them first, and fill the middle with the mixture you just made. You can shape it into a triangle on one side, but make sure to stay about 1 cm away from each side. Then fold it and press the sides together.
4. At this point you can brush some egg whtie over the puff pastry, so you’ll get a shiney and crispy effect later on.
5. Repeat the steps 3-4 untill you have the amount of filled puff pastry you want! Put the pastries on greaseproof paper in the oven tray or at least make sure to butter the tray very well. Otherwise the pastries will stick to your tray and it’ll be real hard to get off and to clean!

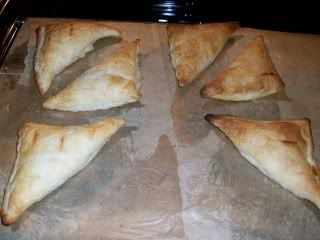
5. Preheat the oven to 180 degrees Celsius or 350 degrees Fahrenheit. When the oven is preheated insert the oven tray and leave it for about 20 minutes. Make sure to keep checking every once in a while and stop the oven when the pastries are golden brown, or start burning. That’s when they’re right or too right!
6. Be careful when you take them out of the oven. Don’t burn yourself and such! If it’s for a party you can serve them on seperate plates. Or if you’re making them for yourself, dump them all on one plate and start eating when they’re cool enough to eat!

Some tips/suggestion for this recipe:
- Poor a bit of lemonjuice in the mixture to add some extra taste!
- Precook any vegetables that take more than some short baking! Make sure to let any oil, water or butter leak from them, before you add them to the mixture. It’ll make the mixture run more.
- The thickness of the mixture doesn't matter that much. Thicker mixture are maybe easier to work with. Make sure the mixture is not too runny though, it'll make more of a mess really!
- You can sprinkle some grated cheese, sesame seeds, basilicum or any other herbs, seeds or spices over the top.
- You can vary the pastries in sizes, and even make little balls with an opening at the top. This would make a very cute and delicious party snack!
- If it doesnt work the first time, or you dont like the taste, don’t give up just yet! There are so many variations to it, there is bound to be something you like.
If there are any problems, just tell me and I’ll help! I hope you enjoy trying this recipe out!

No comments:
Post a Comment