For the original idea you can look here: link
I tried this recipe though, and it did NOT work out! The first problem was getting the chocolate out of the shapes. Using a knife broke them, fingers made them melt; I even tried greasing but that gives an awkward effect and didnt work either! I have no idea how they made that part work.
Other than that, I thought ganache was going to make it a bit too rich and used a mousse that I had tried out before and turned out real delicious then. (though admitted the rest failed back then and the cake look crap!)
Anyway, let’s get to this recipe!

Ingredients chocolate cups:
about 500 grams chocolate
(use any you prefer or you think will fit your decoration or taste best)
1. Double-boil the chocolate untill everything is melted.
2. Use a brush to brush the inside of a SILICONE cupcaketray or so. You can try a non-silicone one. But be prepared to loose some chocolate! Anyway, make sure to coat them thoroughly, maybe even do a second layer and leave them to cool for about an hour.
Ingredients mousse:
4 sheets or 2 teaspoons gelatine
400 grams chocolate
4 large eggs
300 ml double cream
1. Start with soaking the gelatine in 2 tablespoons water, or when using sheets make sure they ‘drown’ in the water.
2. Leave the gelatine for a while and start double-boiling the chocolate. Put it to the side and leave it to cool a little.
3. Seperate the eggs and beat the egg yolks into the chocolate mixture. You might want to beat them a little before pooring them in and then mix well.
4. In a seperate bowl whisk the egg whites until they form soft and fluffy peaks.
5. Add the gelatine to the chocolate and mix it in. Make sure to drain out the water when you’re using gelatine sheets.
6. At last, start with adding one spoon of the whisked eggwhites to the chocolate and mix. Then add the rest in a few additions.
7. Poor it into the chocolate cups you made before and leave it to chill over night. If you want to eat it that same day, you still need a few hours. I cant tell how much.
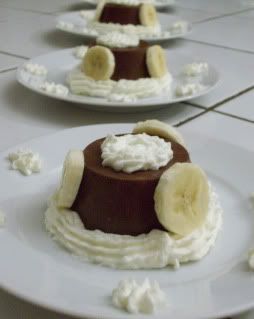
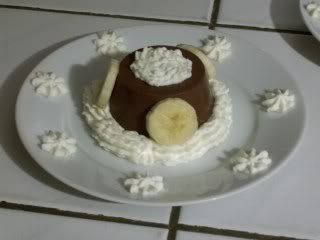
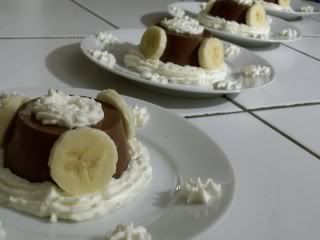
8. When chilled and done, flip them over and out of the silicone onto plates and decorate them!

Tips/suggestions for this recipe:
- use fruit in it! Bleuberries through the mousse made it a lot fresher and it was delicious!
- If you don’t like a hard chocolate cover, why not poor the mousse into pretty desert glasses and add an umbrella to it and some nice decoration. Your guests will be having delicious mousse-in-glass deserts! I can see this idea being served in restaurants!
- The original idea for the moussa was to put it between a chocolate cake. So go ahead, make a chocolate cake, cut it in half, poor the mousse over, leave it to chill for 30 minutes, put the other half on top, chill it a bit more and voilá mousse cake! Works best when you use milk chocolate cake and white chocolate mousse. For the effect you know?

Dont you think the little the deserts look cute? I think they’re so cute! They look kinda steampunkish. I can’t help it! Little cog-like thinggies! Next time I wont do the chocolate cover anymore though. I really didn’t like having to poke through this hard cover of chocolate. It tasted great, but I want it a bit more edible! I don’t want to have a war with my food before it’s edible!
I should be posting more of my "older" recipes soon. I've been far and faaarr behind with posting, but Ive got a new package with ingredients so Im going to have even more to write about! This time it's going to be making my own fondant, and decorate cakes with it! Something I got interested in quite a lot some time ago. I've got two of the most awesome books about it as well! I'll make sure to post more soon!

No comments:
Post a Comment