Wednesday, August 15, 2012

Banana Cake

It’s been raining banana’s here. Okay not really, but everyone seems to buy them and no one’s actually eating them. This is one of the first things I thought of to get rid of them. I’m no fan of plain banana’s, but I’d never say no to banana cake. I browsed the internet until I found something that would work for me. I found a Banana Cake that required melted butter. Having found a recipe that sounded good enough to me, I set straight to work.

Photobucket

Ingredients:
200 grams unsalted butter
175 grams caster sugar
100 + 150 grams plain flour
4 eggs
1 lemon
200g banana (about 2 bananas)
3 tablespoons baking powder
Powdered sugar and lemon juice for glazing


1. Start with mashing the banana and zesting the orange.
2. Melt the butter and mix it with the sugar until smooth. Add 100 grams flour and mix again.
3. Beat the eggs lightly and add them to the mixture in 4-5 additions, beating well in between.
4. Lastly mix in the lemon zest, 2 tablespoons lemon juice and the mashed banana.
5. Sift 150 grams flour with the baking powder over the batter and use your mixer one last time.
6. Line or grease a cake tin and pour the mixture into the tin. Preheat the oven to 160 degrees Celsius or 320 degrees Fahrenheit.
7. Leave the cake in the oven for about 35-45 minutes or until a skewer comes out clean.
8. For the glazing, add lemon juice with enough powdered sugar to make a thick, but still liquid consistency. Spread over the top of the cake with a brush.

The cake came out so beautifully moist! I was quite surprised this came out so wonderful. I can’t even begin to describe how horrible the oven is I’m using so anything that comes out the way I want it is a miracle.
I’m going to have to admit again that I could’ve spend more time on taking pictures. Or on the glazing I put on it at that. I just couldn’t help but want to eat it. I wish I could tell you how it smelled or made it look better to make you drool all over the place. But you’re going to have to do with this. And take my word for it. You want this.

Photobucket

Banana Oat Cookies (2 ingredient cookies)

I haven’t posted anything in ages! I’m so SO sorry. But I’ve got a good excuse! I’ve been abducted by aliens who got stuck in traffic mainly because the bridge was open and they forgot time and all they really wanted to do was keep me from posting. Good news is they weren’t after my brains so I survived all of this. No. Actually I have vacation and I’ve been too busy and too lazy. I’ve been baking a lot and wrote down a lot of recipes, but I simply haven’t posted them. I have some actual Good News though. I’ve been trying to hone my photography skills so my pictures should start to look better from now on.


So now for some actual baking. I found this recipe when I was searching the web for some DIY things to do. The writer was totally enthusiastic about the two ingredient cookies. For the most basic cookie I can think of you need at least butter, sugar and flour, so cookies with just two ingredients sounds amazing! I’m not sure what made me make these cookies as banana’s are definitely one of my least favourite fruits and I was never a fan of oats either. The idea of adding raisins was nice though. But I think what made me make these cookies was the writers enthusiasm about her 2 ingredient cookies and my curiosity on actual two ingredient cookies. So I made it. And ate them all. I didn’t actually share them either. I’m horrible, I know!

Photobucket

Ingredients:
2 bananas
1/2 cup oats
1/4 cup extra’s (like raisins or chocolate chips)


1. Mash the bananas in a bowl with a fork until you’ve got rid of the biggest lumps. I like a few banana chunks in there, but feel free to mash it all the way.
2. Add the oats and whatever else you’re adding (or not) and mix away.
3. Dump the ‘batter’ in cookie-sized bites on an oven plate (either greased or lined with greaseproof paper!!) and dump into a preferably preheated oven of 180 degrees Celsius or 350 degrees Fahrenheit for 10-15 minutes.

See? It’s totally easy right? This is the easiest 100% no-fail recipe I’ve ever seen and I actually like it. It’s totally healthy too! I’ve made it quite a few times since the first time and added chocolate instead of raisins as well. I’m going to have to agree they don’t look the most appetizing, but I’m sure you’ll be surprised!
Enjoy! And have a nice vacation to those of you who have also gotten lost in the space-time continuum!

Sunday, July 1, 2012

Lemon cupcakes

I quickly made these for my family birthday party. I still had some extra lemons from the Lemon Sorbet I made that same day and decide lemon cupcakes would be a brilliant idea! So I looked up all the ingredients and ended up with this recipe. I’m kind of disappointed about the fact that the recipe doesn’t call for lemon juice as I’d like to add that alongside the zest, but I didn’t have the time for researching recipe that call for juice and wasn’t sure if you can substitute milk for juice in recipes for normal cupcakes. Anyway, these weren’t all that bad in the end and they did taste like lemon!

Photobucket

Ingredients:
125 grams butter
125 grams soft sugar
2 eggs
100 grams yogurt
125 grams self-rising flour
Zest of 2 lemons


1. Beat the butter until soft. Then add the sugar and beat again until fluffy. Lastly add the lemon zest.
2. Sift the self-rising flour through the batter in 3-5 additions.
3. Beat the eggs lightly and mix them with the yogurt.
4. Add the yogurt mixture to the butter mixture and beat everything together.
5. Spoon the batter into cupcake cups and leave them in a preheated oven of 170 degrees Celsius or 340 degrees Fahrenheit for about 20 minutes.

Photobucket

These cupcakes came out completely flat on top. Which makes them perfect for decorating! Unfortunately I didn’t have the most spectacular topping, but I think this sort of simplicity made them look quite elegant still. I can’t remember what exactly I made for the topping. I know there’s lemon zest on it and I believe the topping is cream cheese with lemon juice and powdered sugar to get the right consistency and taste, but I’m not 100% sure anymore.

Cool me down with Summer Ice Cream

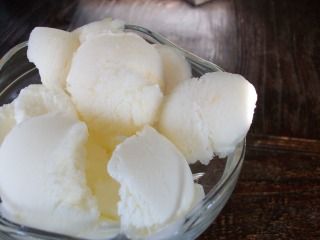
Nothing is better for cooling down in summer than ice cream. And no ice cream is better than lemon sorbet. During the hot days this ice cream will definitely cool you down and make you feel better. The slightly tangy taste of yogurt makes the yogurt ice cream very refreshing as well. So here I present to you two perfect summer ice creams!
Photobucket

I served them to my family on my birthday party and I got compliments from everyone. Somehow I always do when I bake for family, but not always from EVERYone and I don’t get asked where I got the ice cream machine, how it works and if my uncle should buy it too, because he’s seriously thinking about it. I’ve looked ice cream machines up, and they’re about 40 euros max., so if you eat a lot of ice cream and would definitely prefer home-made ice cream (who wouldn’t?) AND you have space in your house, then I definitely wouldn’t hesitate.
The only thing I hated about this recipe was making pictures. I don’t have an ice cream scoop so I couldn’t make perfectly shaped balls. Then I put them in a bowl and realized they were melting. MELTING! How can someone make nice pictures when they’ve got only a minute or two to make them?

Lemon Sorbet Ice Cream

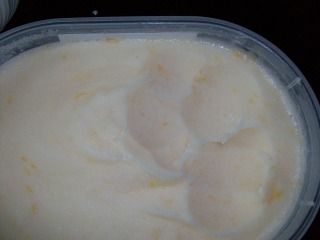
It’s like lemonade only then the ice cold edible version. It has real zest in it, but feel free to leave that out. You could also leave out the sugar for a sugar-free version (use 450 ml water instead), but it could get very tangy then. I don’t really know what to say about this ice cream. It’s lovely. It’s Lemon Sorbet.
Do keep in mind that this ice cream is made using an ice cream maker. If you don’t have the machine to do it you’d get a different texture for sure. You can still use the same recipe, but I’d advice to leave out the egg white. You’d have to leave it in the freezer and come back every 15-30 minutes to mix it a bit like granita. I haven’t tried this, but it could work. Also, you can just as easily use this recipe to make ice cream Popsicles. You wouldn’t have to mix it every half hour. I’d still leave out the egg white, since this floats on top originally and gets incorporated through the mixing process.
Photobucket

Ingredients:
Juice of 1/2 an orange
250 ml lemon juice (4-5 lemons)
Zest of 1 lemon
250 ml water
275 grams sugar
1 egg white


1. Put the water and sugar in a pan and dissolve the sugar on medium heat. Bring to boil and leave for about one minute and then leave to cool.
2. Juice the orange and the lemons and mix them together with the cooled syrup.
3. Beat the egg white till it becomes fluffy but do NOT let it become stiff.
4. Whisk all the ingredients together and leave in an ice cream maker for about 30 minutes.
5. Put the ice cream into a box and leave in the freezer for an additional hour or so, especially on hot summer days.
Photobucket

Yoghurt Ice Cream

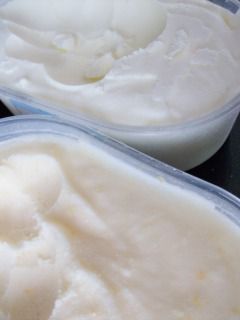
Yogurt Ice cream gives a perfectly white colour, which actually surprised me when I looked at it. Then again, it’s not surprising yogurt ice cream ends up white. It’s slighly tangy from the yogurt, but just enough sweet to not be annoying. A lot of people thought this was vanilla ice cream, but I don’t taste the vanilla at all. I guess that just means everyone likes it.
Keep in mind that this recipe is also made with an ice cream maker. If you don’t have the machine the texture would be completely different. I imagine you’d have to put it in the freezer and come back every half hour to fifteen minutes or so to mix it. I’m not sure if this works and haven’t tried it!

Ingredients:
350 grams thick (Greek) yogurt
200 ml milk
125 grams sugar
150 ml whipping cream
15 grams vanilla sugar


1. Beat the whipping cream with the sugars together until it gets thick. Do NOT let it become stiff. A thick runny texture will do.
2. Mix the yogurt with the milk.
3. Beat the whipping cream mixture while you pour in the yogurt mixture, or mix them in several additions.
4. Pour into an ice cream maker and leave for about 30 minutes.
5. Put the ice cream into a box and leave in the freezer for an additional hour or so, especially on hot summer days.

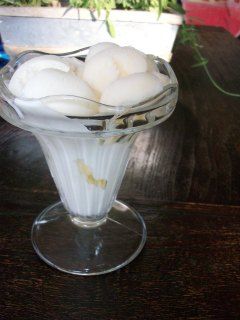
And tadaa! You've just made two delicious ice creams! Scoop them into balls and put them on a cone, or serve them in a bowl. Serve them with hot chocolate or strawberry sauce or add a little cookie. I don't mind how you eat it, I assure you'll love it any way! Enjoy!
Photobucket

It's melting! - try making pictures of ice cream. It's simply not done.